Selfhosted Live TV the easy way
After running self-hosted Live TV for several years, I've learned a few things the hard way. This article walks through my current Dispatcharr and Jellyfin setup, including EPG configuration, channel management, and playback optimizations.
A while ago I made a post about setting up Live TV.
Since then, a couple of things have changed:
- setting up EPG has become much easier
- Threadfin has been abandoned and basic functionality isn't there anymore
- I've learned from my mistakes and discovered some new interesting things
Before getting started, I feel obliged to include the following disclaimer :
This article describes a technical setup for aggregating and managing television streams. It is not intended to encourage piracy or circumvent licensing restrictions.
Getting icons for channels
One of the things that bothered me is that not all IPTV providers supply up-to-date channel icons or any icons at all.
For that I found the tv logos repository.
It provides free, high-quality logos for thousands of television channels from around the world.
EPG
Existing EPG sources
If you live in Spain, dobleM is amazing.
It provides EPG information for nearly all television channels available in Spain.
There are also several other EPG providers available. Some are free, while others require a subscription.
For example Open EPG seems to provide information for a whole lot of channels.
EPG grabber
You can also set up your own EPG grabber. This article explains it well.
Since writing that article, I have stopped maintaining the custom fixes, so I recommend leaving them disabled.
It boils down to this:
version: '3.3'
services:
  epg:
    image: git.claeyscloud.com/david/epg-info:latest
    #image: ghcr.io/davidclaeysquinones/epg-info:latest
    #image: davidquinonescl/epg-info:latest
    #image: lavaforge.org/davidquinonescl/epg-info:latest
    volumes:
      # add a mapping in order to add the channels file
      - /docker/epg:/config
    ports:
      - 6080:3000
    environment:
      # specify the time zone for the server
      - TZ=Etc/UTC
    restart: unless-stopped
These are some providers you could use:
- telenet.tv (Belgium)
- pickx.be (Belgium)
- orangetv.orange.es (Spain)
- tvgids.nl (Netherlands)
- tv24.co.uk (UK)
- tvtv.us (US)
- chaines-tv.orange.fr (France)
Setting up Live TV
Setting up Live TV can be done in many ways.
At a high level, every Live TV setup consists of two components: a frontend (the user interface) and a backend (the TV source and management layer).
There are many UIs available, such as: Jellyfin, Plex, Emby and so on.
Each UI has its own advantages and disadvantages, but comparing them is outside the scope of this article. In this guide we will use Jellyfin as the user interface.
There are also many backends available: Dispatcharr, Threadfin, xTeVe, StreamMaster and so on.
At the time of writing, most of these backends are either abandoned, lightly maintained, or in an uncertain state. Dispatcharr is currently the only option I can confidently recommend. While you can choose almost any frontend you like, Dispatcharr is currently the only backend I would recommend.
Depending on your IPTV provider and local regulations, you may want to route Dispatcharr through a VPN. In my setup I use Gluetun together with Mullvad.
Your compose stack should look like this :
version: "3.5"
services:
  jellyfin:
    image: linuxserver/jellyfin:latest
    network_mode: host
    volumes:
      - /docker/jellyfin/jellyfin/config:/config
      - /docker/jellyfin/jellyfin/cache:/cache
      # add this volume mapping in order to enable recordings
      - /Recordings:/recordings
    restart: unless-stopped
    environment:
      - PUID=${PUID}
      - PGID=${PGID}
      - JELLYFIN_PublishedServerUrl=#your jellyfin URL#
    devices:
      - /dev/dri:/dev/dri
  vpn:
    image: qmcgaw/gluetun
    healthcheck:
      test: wget -O - https://am.i.mullvad.net/connected | grep -q "You are connected"
    cap_add:
      - NET_ADMIN
    devices:
      - /dev/net/tun:/dev/net/tun
    sysctls:
      - net.ipv6.conf.all.disable_ipv6=0
    environment:
      - TZ=${TIME_ZONE}
      # example setup for mullvad, have a look at https://github.com/qdm12/gluetun-wiki/tree/main/setup/providers to see all available providers
      - VPN_SERVICE_PROVIDER=mullvad
      - VPN_TYPE=wireguard
      - WIREGUARD_PRIVATE_KEY=${VPN_PRIVATE_KEY}
      - WIREGUARD_ADDRESSES=10.67.83.197/32
      - SERVER_CITIES=${VPN_CITY}
      # adapt this value according to your network topology
      - FIREWALL_OUTBOUND_SUBNETS=192.168.0.0/24
      - DNS_UPSTREAM_RESOLVER_TYPE=doh
      - DNS_UPSTREAM_RESOLVERS=cloudflare
    ports:
      #dispatcharr
      - 9191:9191
    volumes:
      - /docker/jellyfin/vpn:/config
    restart: unless-stopped
  dispatcharr:
    image: ghcr.io/dispatcharr/dispatcharr:latest
    network_mode: service:vpn
    volumes:
      - /docker/jellyfin/dispatcharr:/data
    environment:
      - DISPATCHARR_ENV=aio
      - REDIS_HOST=localhost
      - CELERY_BROKER_URL=redis://localhost:6379/0
      - DISPATCHARR_LOG_LEVEL=info
    cap_add:
      - SYS_NICE
    devices:
      # this is used for Intel/AMD GPU acceleration (VA-API)
      - /dev/dri:/dev/dri
And you should provide values for the following variables :
- TIME_ZONE
- VPN_PRIVATE_KEY
- VPN_CITY
- PUID=1000
- PGID=1000
Setting up Dispatcharr
TL;DR:
Dispatcharr sits between your TV provider(s) and Jellyfin. It lets you manage channel numbering, assign logos, match EPG data, filter unwanted channels, and combine multiple sources into a single, clean TV lineup that can be consumed by the frontend of your choice.
Setting up M3U
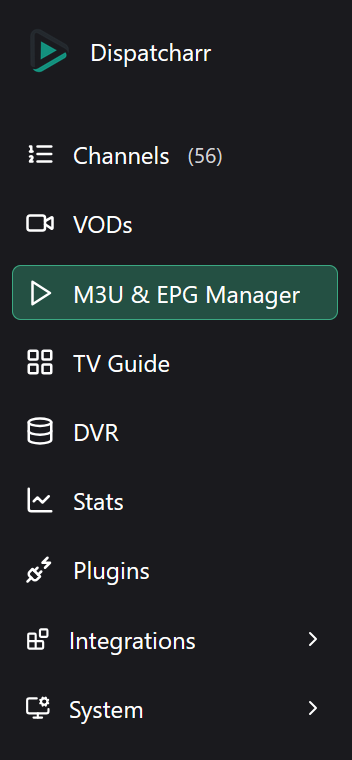
First, open the M3U & EPG Manager from the menu bar.
After that click the Add M3U button and a popup should appear.
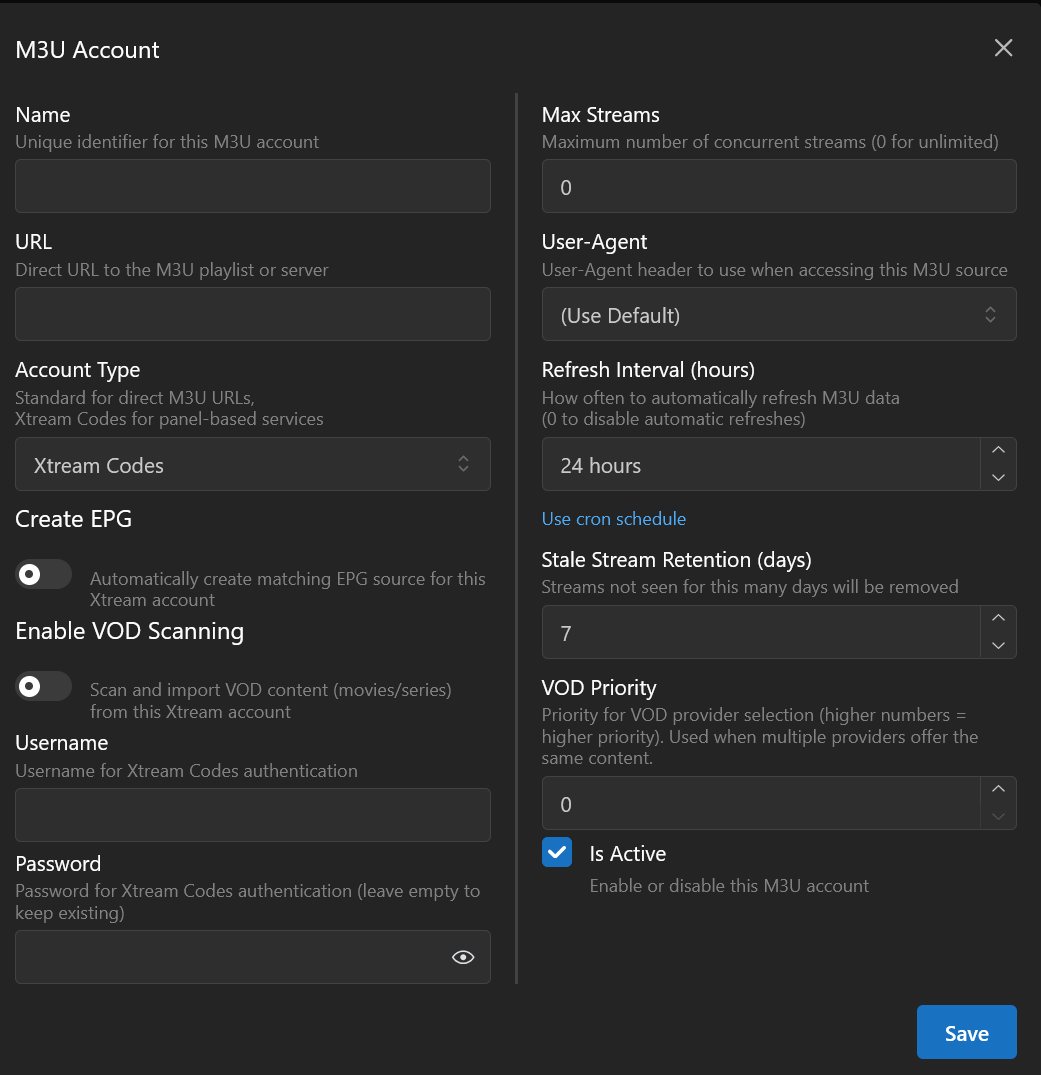
Here you're supposed to enter a M3U playlist or Xtream user credentials.
Acquiring a playlist is usually the most challenging part of the setup.
Depending on where you live, legitimate IPTV providers may be available or in other cases you might need to sail the seven seas.
Another option is to receive DVB-T or DVB-S broadcasts and redistribute them through TvHeadend.
That's a topic on its own, but be aware that in some places it's a perfectly reasonable option.
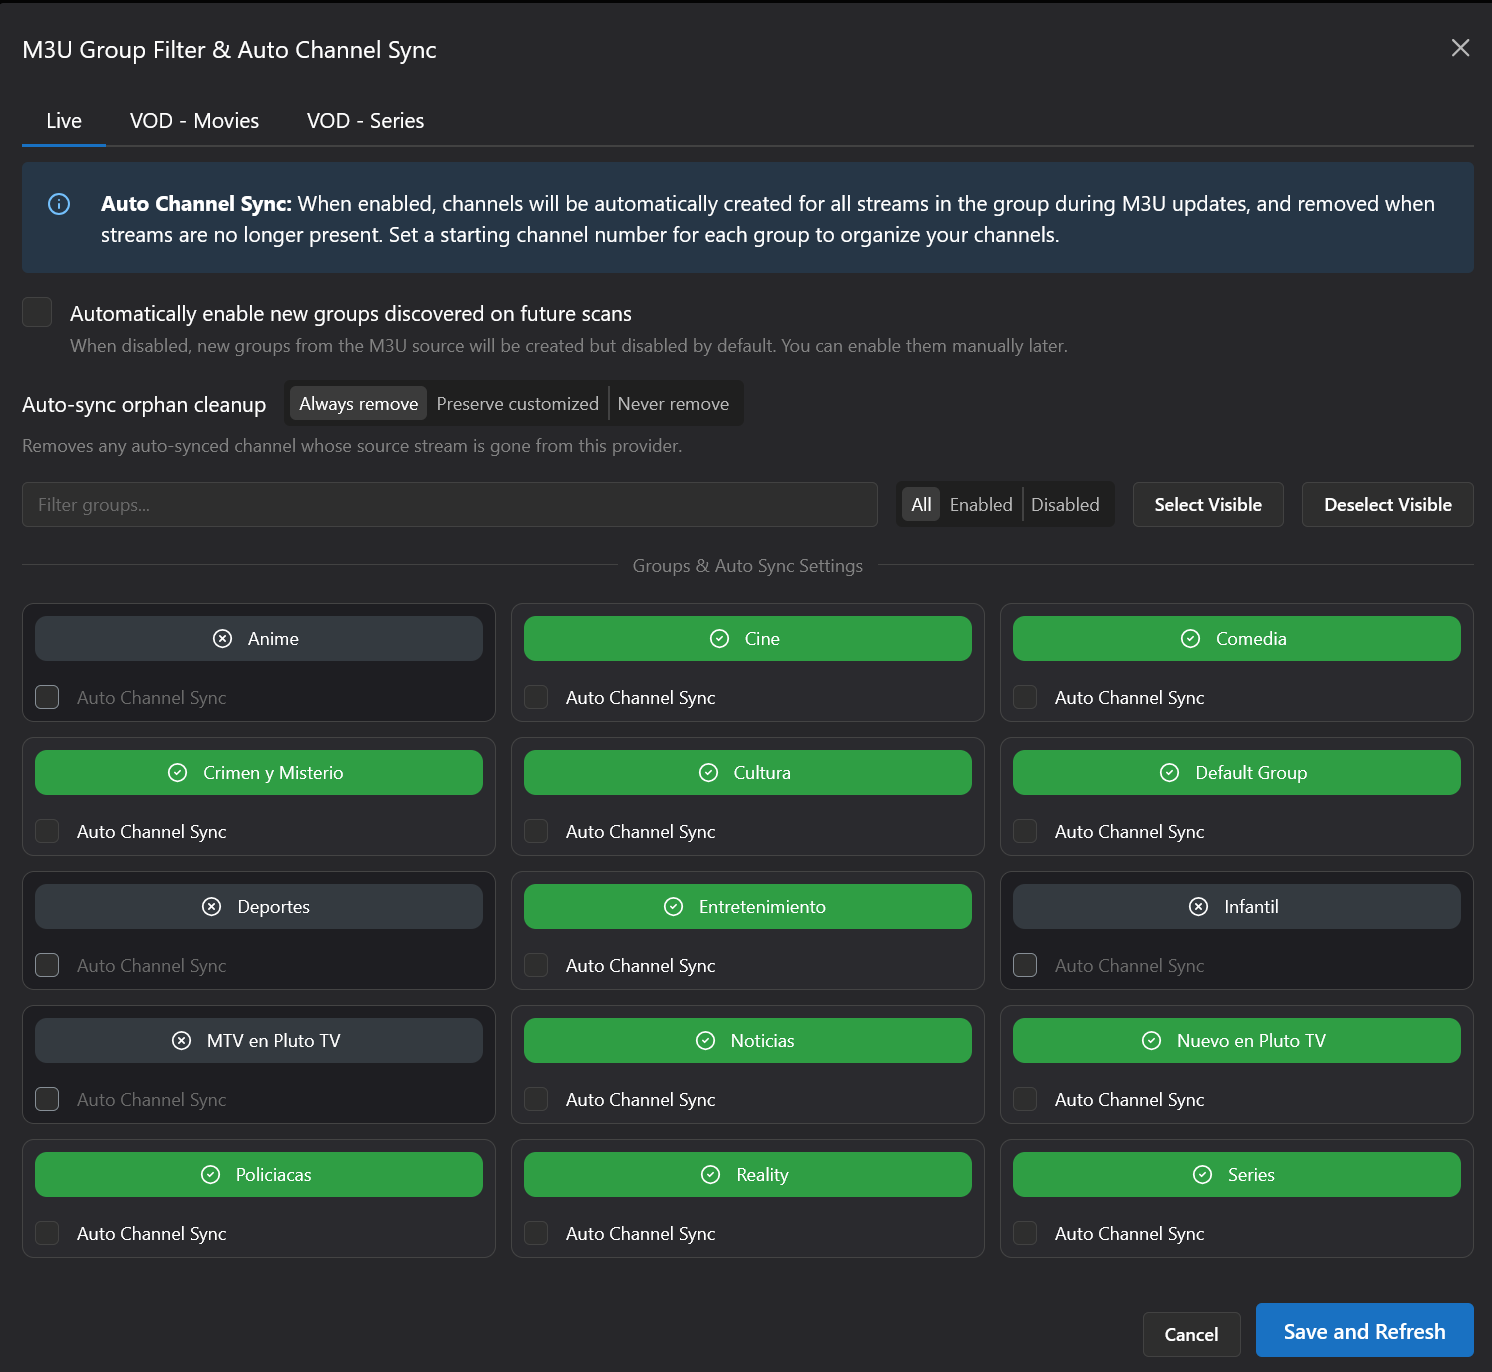
Normally you will be asked to select which groups you want to include.
Some providers offer thousands of channels. Filtering them here reduces clutter, simplifies channel management, and can improve performance.
Setting up EPG
We're still in the M3U & EPG Manager and this time we're going to click Add EPG > Standard EPG Source.
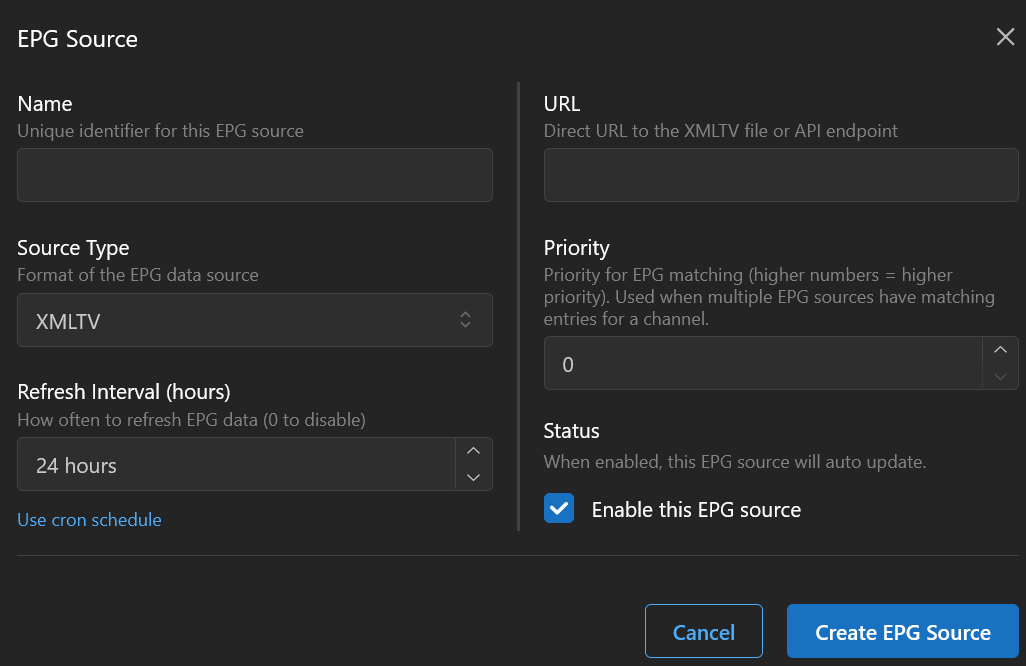
Give the source a descriptive name and enter the URL of your chosen EPG feed.
Matching channels
At this point we have added channel and EPG sources, but Dispatcharr is not yet publishing any channels.
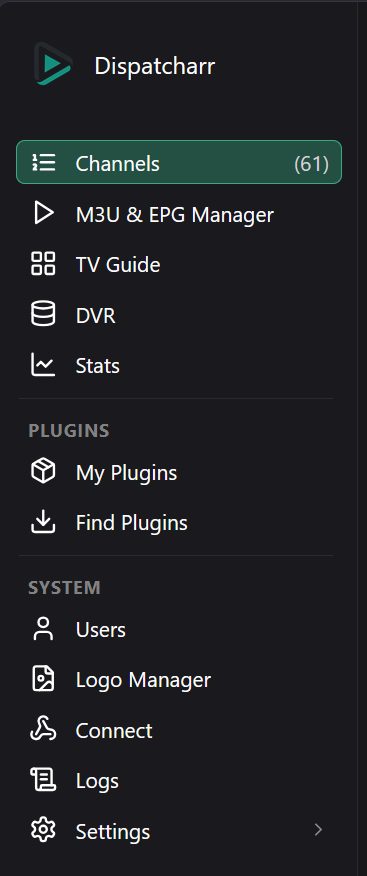
To do that, open Channels from the menu bar.
The interface may look a little intimidating at first, but the workflow is actually quite straightforward.
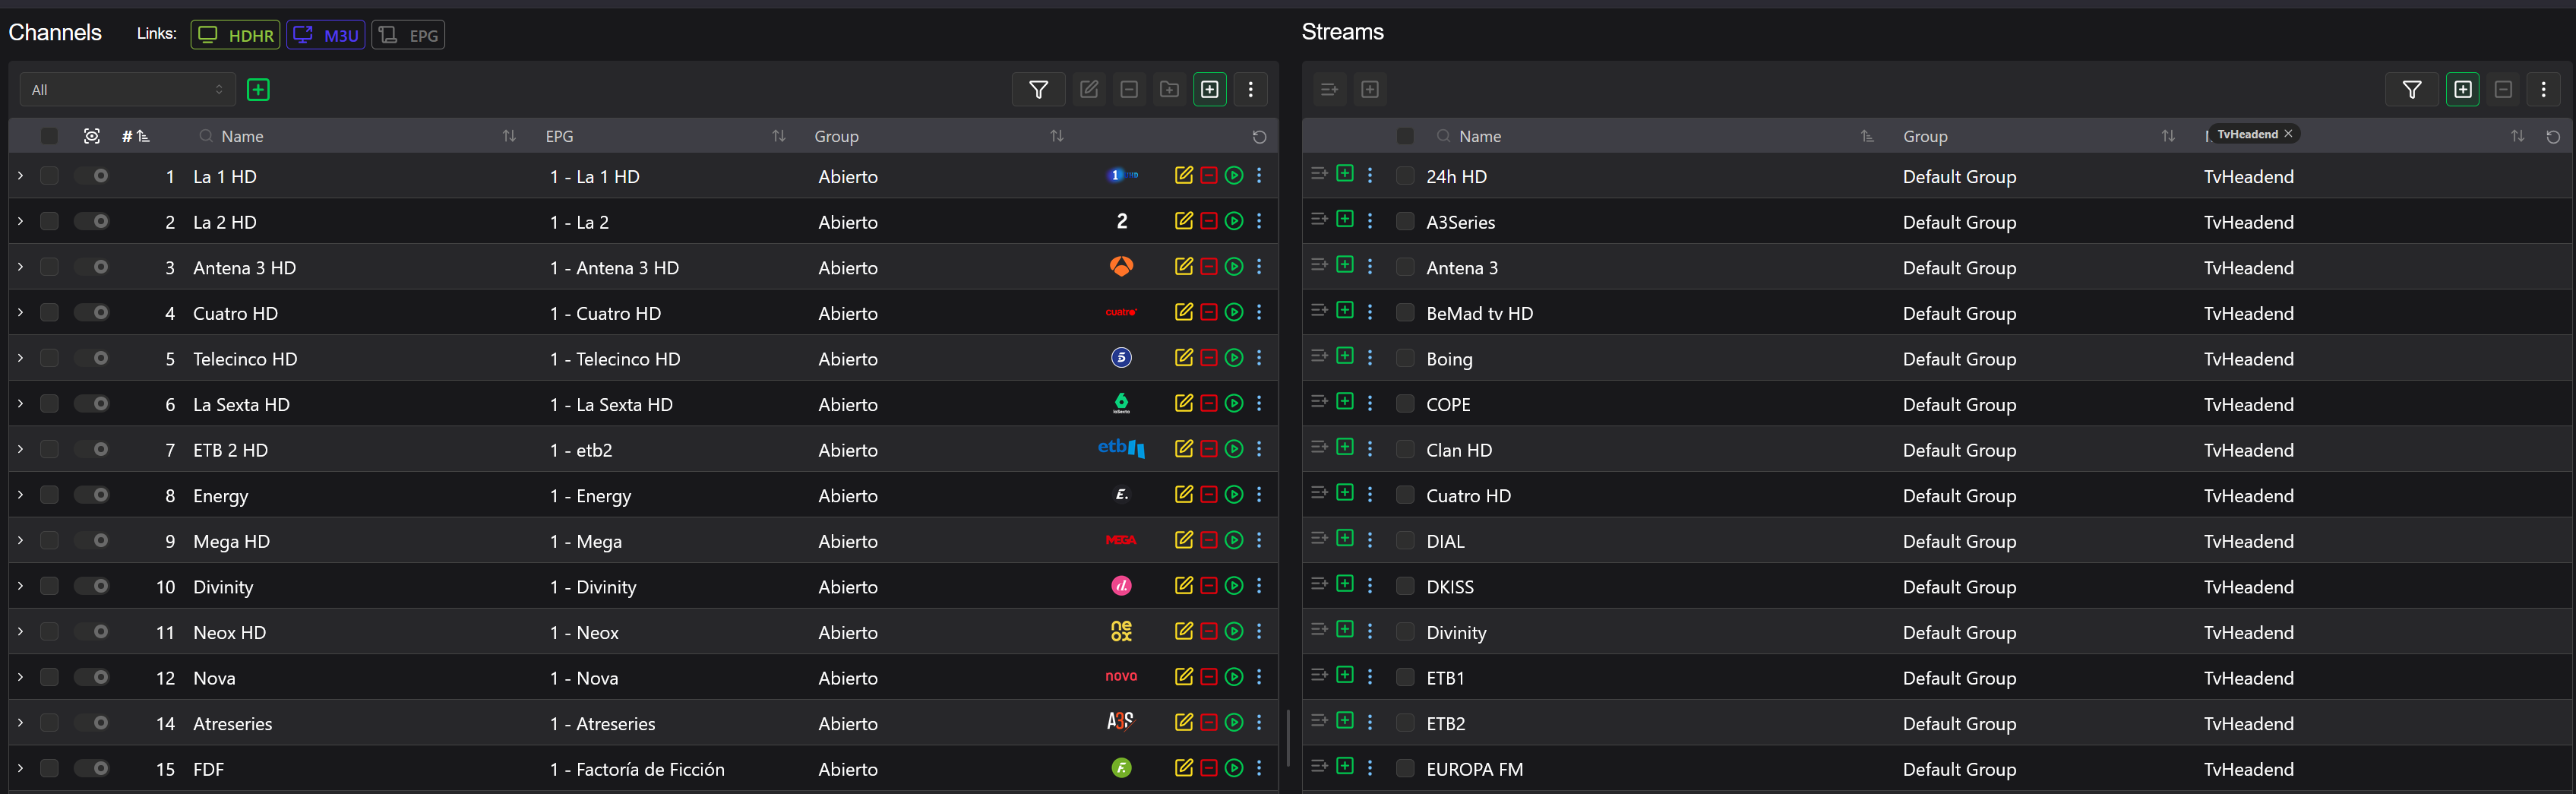
When you open this for the first time, the left half will be empty, which is normal because this section shows the channels that are being published by Dispatcharr.
If you've added a playlist in the previous steps, its channels should appear on the right side of the screen.
Looking more closely, you'll notice that each channel has a Create New Channel button.
When you click that button, the following dialog will appear.
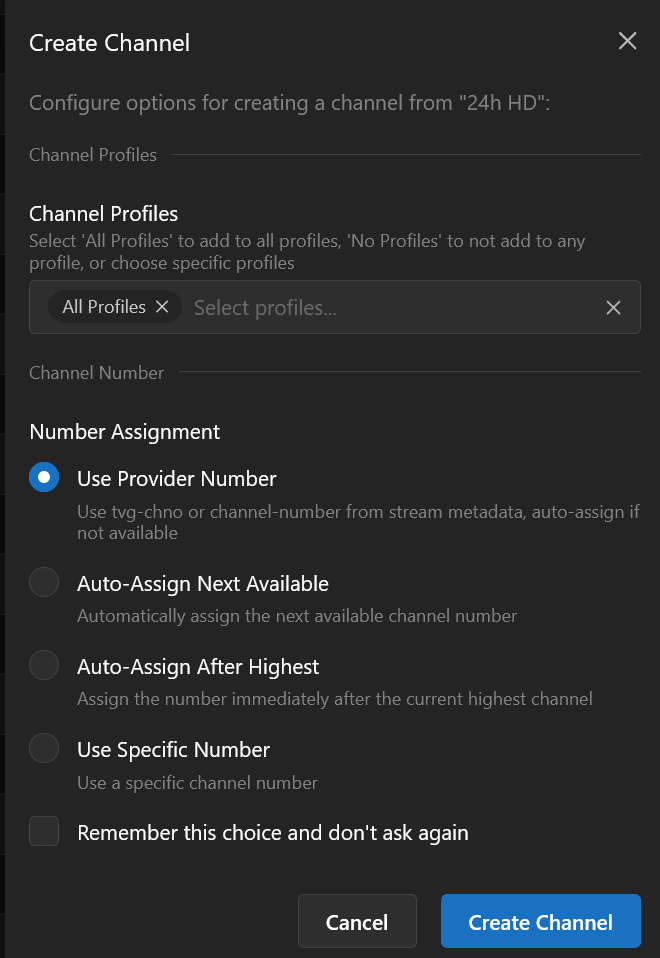
I usually select Use Specific Number and assign a channel number myself. This number determines the order in which channels will appear later in Jellyfin, making it easy to create a lineup that matches your preferences.
Normally, a channel should now appear on the left side of the screen. This means the channel has been added to your output lineup and will be exposed to Jellyfin through Dispatcharr.
At this stage, however, the channel information is still fairly limited. The channel does not yet have an EPG source assigned, a logo configured, or a channel group associated with it.

We need to click the Edit button for the newly created channel.
This opens the channel configuration dialog.
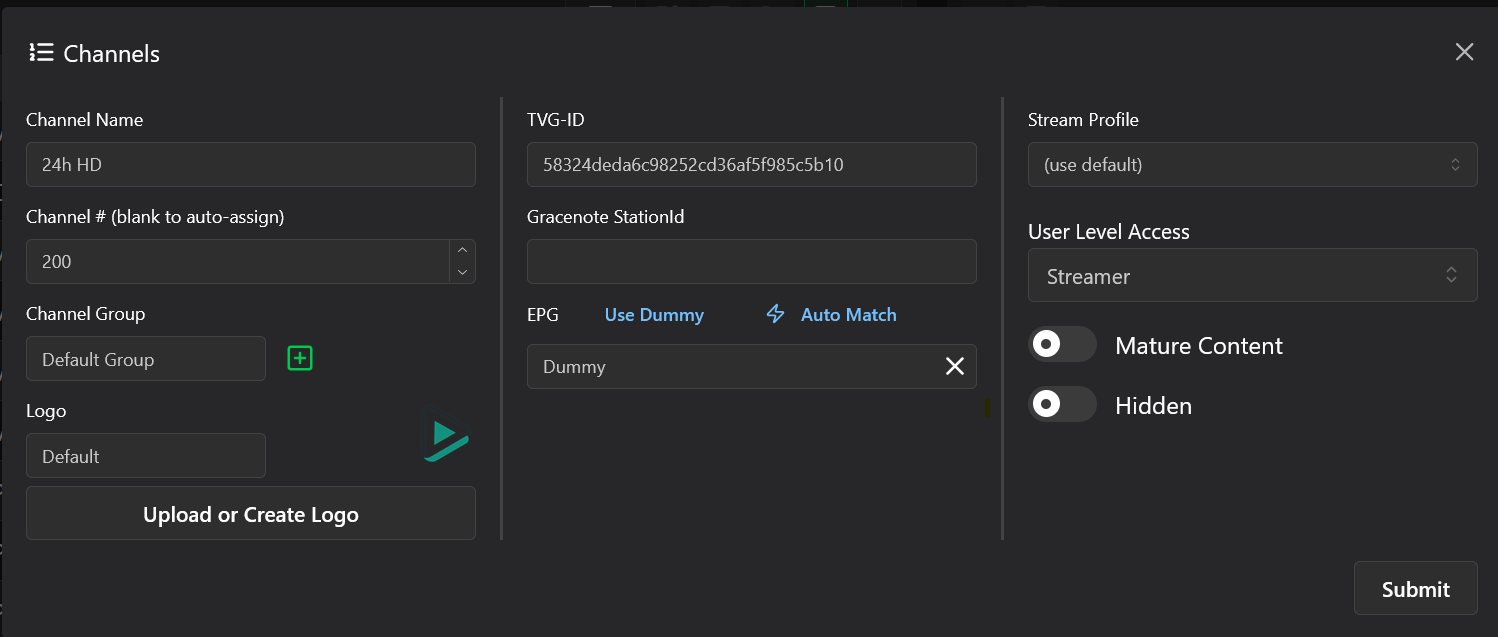
From here, the process is fairly straightforward:
- Adjust the channel name if necessary
- Assign the channel to a group
- Configure a channel logo
- Select the appropriate EPG entry
Once you're happy with the configuration, save the channel and repeat the process for any other channels you want to make available.
Setting the M3U Hash Key
This step is not strictly necessary, but it's a setting I learned about the hard way.
For a long time, I experienced channels randomly becoming unavailable every couple of hours. This meant I had to rematch channels multiple times a day.
After more troubleshooting than I'd like to admit, I discovered that changing the M3U hash key can solve these issues.
You can find this setting under Settings > Stream Settings.
You can set it to whatever works best for your provider. In my case, I use TVG-ID + Group, which has proven to be stable and prevents the need to rematch every time the playlist is refreshed.
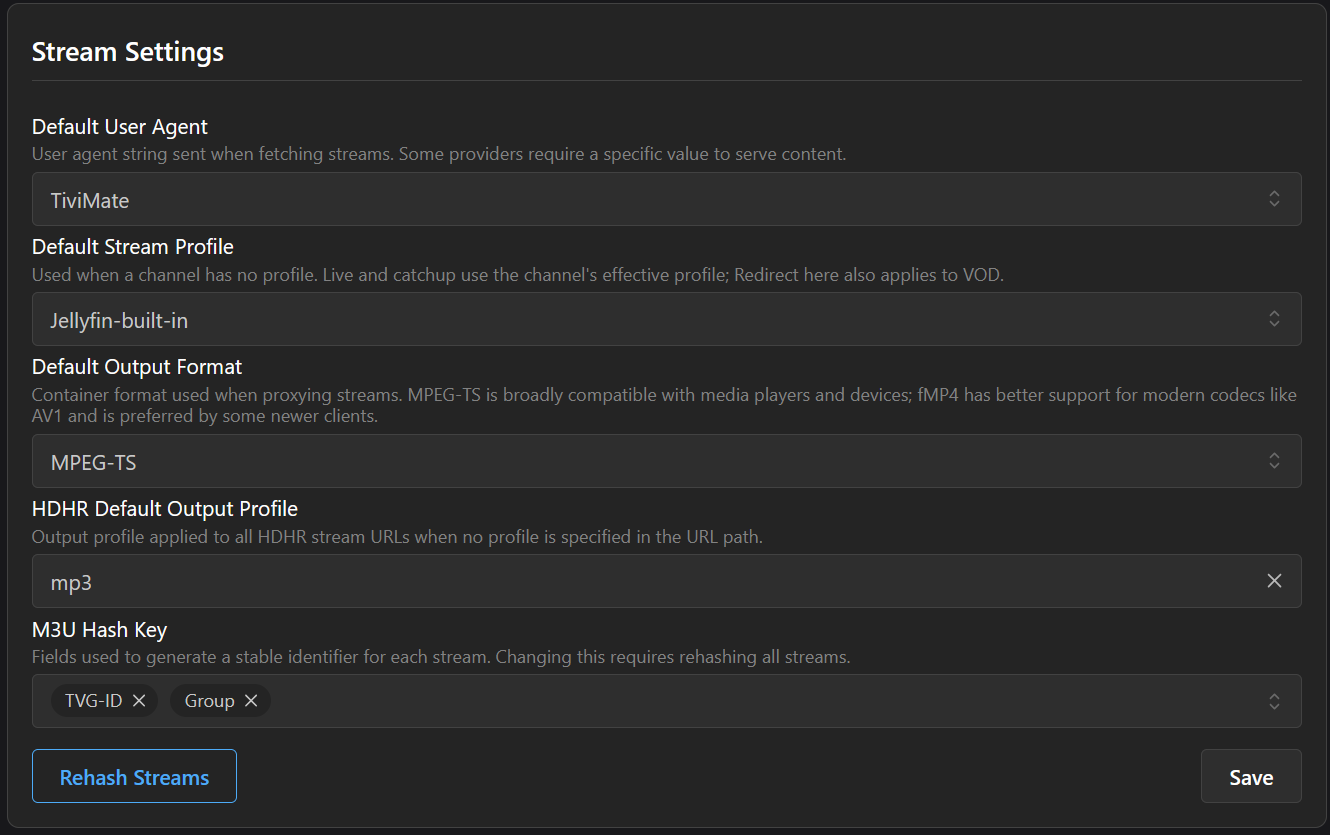
Setting up Stream and Output profiles
Under Settings, you'll find both Stream Profiles and Output Profiles.
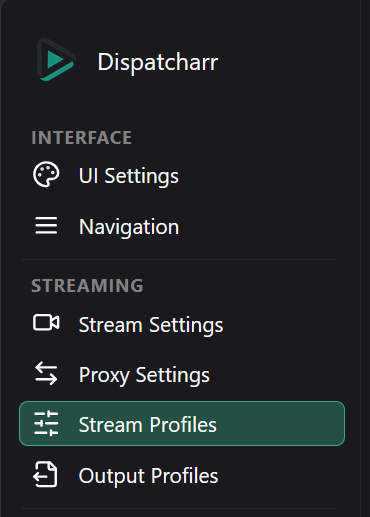
My understanding is that Stream Profiles mainly control how the video stream is processed and transmitted, while Output Profiles affect the audio format.
There is a lot more to these settings than I cover here, but for most users it is enough to know that they can have a significant impact on compatibility and playback stability.
Again, this is not strictly necessary, but if you want smooth video playback, you'll definitely want to choose profiles that work well with your clients. Some clients can be a bit picky about which formats they are willing to play.
Stream profiles
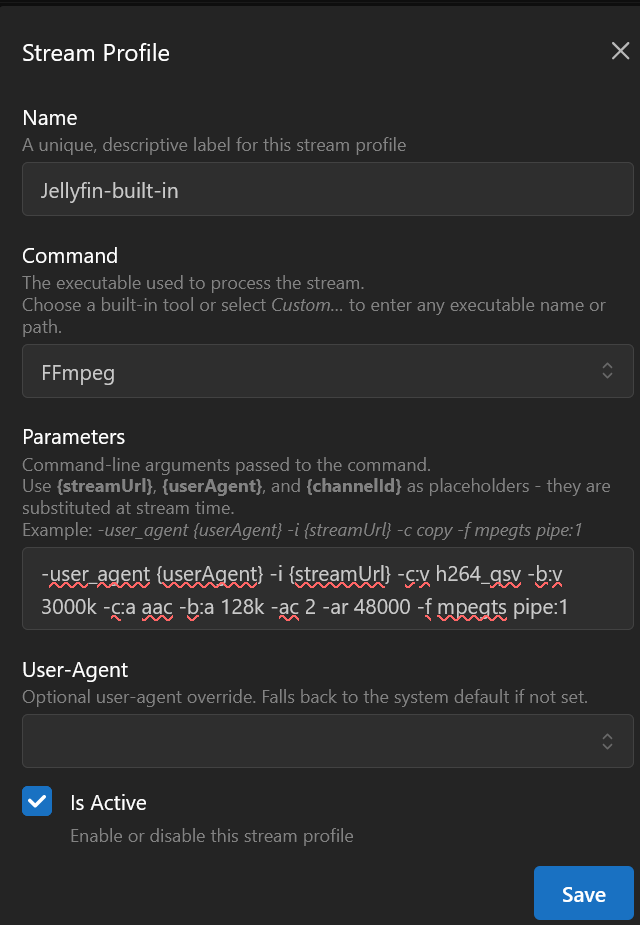
The stream profile I'm going to provide is not of my own making. It originally came with the Embyfin Stream Cleanup plugin. However, at the time of writing, that plugin appears to have been deprecated. The profile itself has been a lifesaver, though.
The stream profile is called Jellyfin-built-in and uses FFmpeg.
-user_agent {userAgent} -i {streamUrl} -c:v h264_qsv -b:v 3000k -c:a aac -b:a 128k -ac 2 -ar 48000 -f mpegts pipe:1
Output profiles
Now let's look at Output Profiles.
The profile I'm going to provide is the result of issues I encountered with streams coming from TvHeadend. Some channels expose multiple audio tracks, for example different languages, and that's not something Jellyfin always handles particularly well.
You might sit down expecting Spanish dubbing, only to discover that the channel is playing the original audio track instead. Some people may prefer that, but it wasn't the experience I wanted for my users.
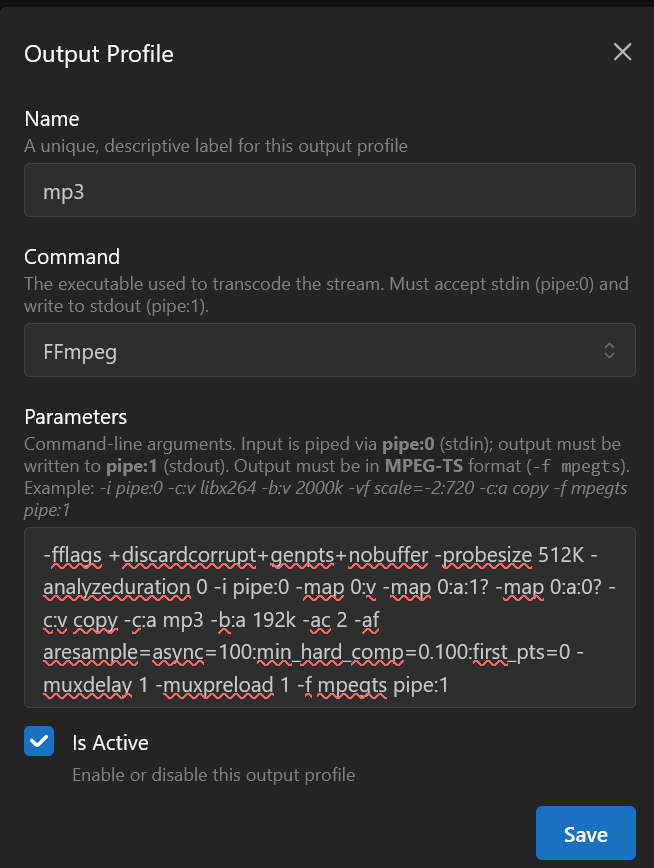
The output profile is called mp3 and uses FFmpeg behind the scenes:
-fflags +discardcorrupt+genpts+nobuffer -probesize 512K -analyzeduration 0 -i pipe:0 -map 0:v -map 0:a:1? -map 0:a:0? -c:v copy -c:a mp3 -b:a 192k -ac 2 -af aresample=async=100:min_hard_comp=0.100:first_pts=0 -muxdelay 1 -muxpreload 1 -f mpegts pipe:1
The important part here is:
-map 0:a:1? -map 0:a:0?
These parameters tell FFmpeg which audio stream should be used. FFmpeg will first attempt to use audio stream 1. If that stream does not exist, it will automatically fall back to audio stream 0.
Whether this solves your problem depends entirely on how the source stream is structured. Your provider might only expose a single audio track, or the available tracks may appear in a completely different order.
The important takeaway is not the exact values I use, but understanding that FFmpeg allows you to explicitly select a preferred audio track and define fallback behaviour when multiple tracks are available.
Tying everything together
As a final step, I recommend setting these profiles as the defaults. Later on I'll show how individual profiles can be selected for specific channels, but having sensible defaults is a good starting point.
We'll want to return to the Stream Settings page.
This time we want to adjust the Default Stream Profile and Default Output Profile to the profiles we configured earlier.
Doing so ensures that, when we later add Dispatcharr as a Live TV source in Jellyfin, Jellyfin will consume the channels using these output profiles.
Setting up Jellyfin
Honestly, Jellyfin is a world of its own. This article is already getting quite long, and there are thousands of guides available that explain the basics of setting up Jellyfin.
Instead of covering Jellyfin in detail, I'll focus on the part that matters for this guide: connecting Jellyfin to Dispatcharr.
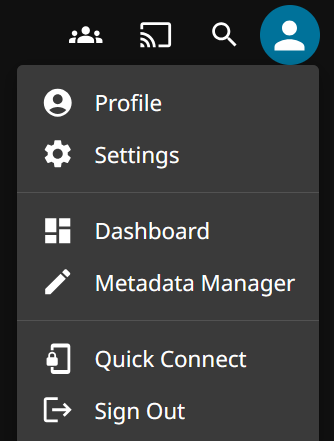
You'll want to log in with an administrator account and open the administrator dashboard.
It is available through the user profile dropdown.
On the left navigation panel you'll notice the Live TV section.
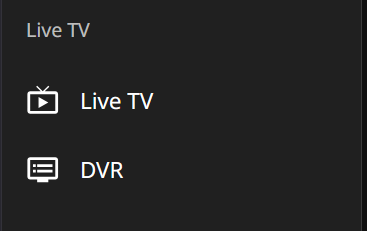
Open the Live TV section.
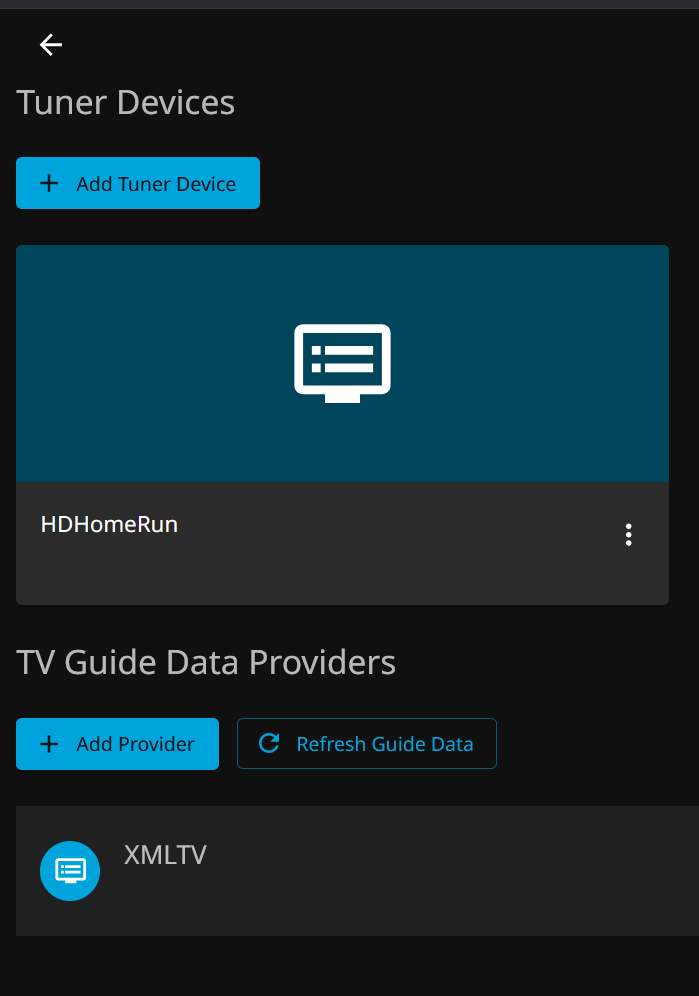
The first time you open this page, it will be empty.
You'll want to return to Dispatcharr to the Channels page.
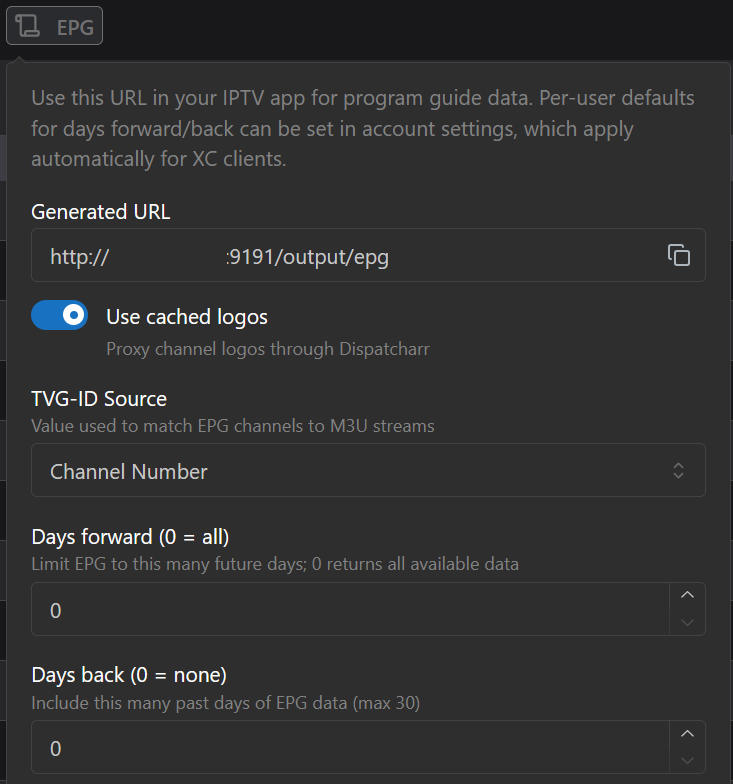
On top of the page you'll notice HDHR and EPG.
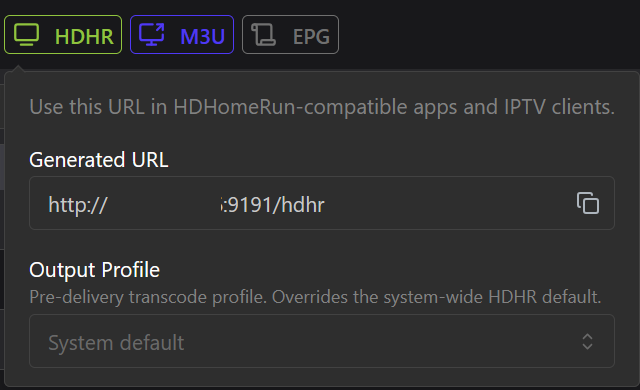
You can see that an Output Profile can be selected. Normally, the System Default profile is used, but you can override it if needed.
Click on the Copy button in order to have our URL ready to be pasted into Jellyfin.
Return to jellyfin and click Add Tuner Device
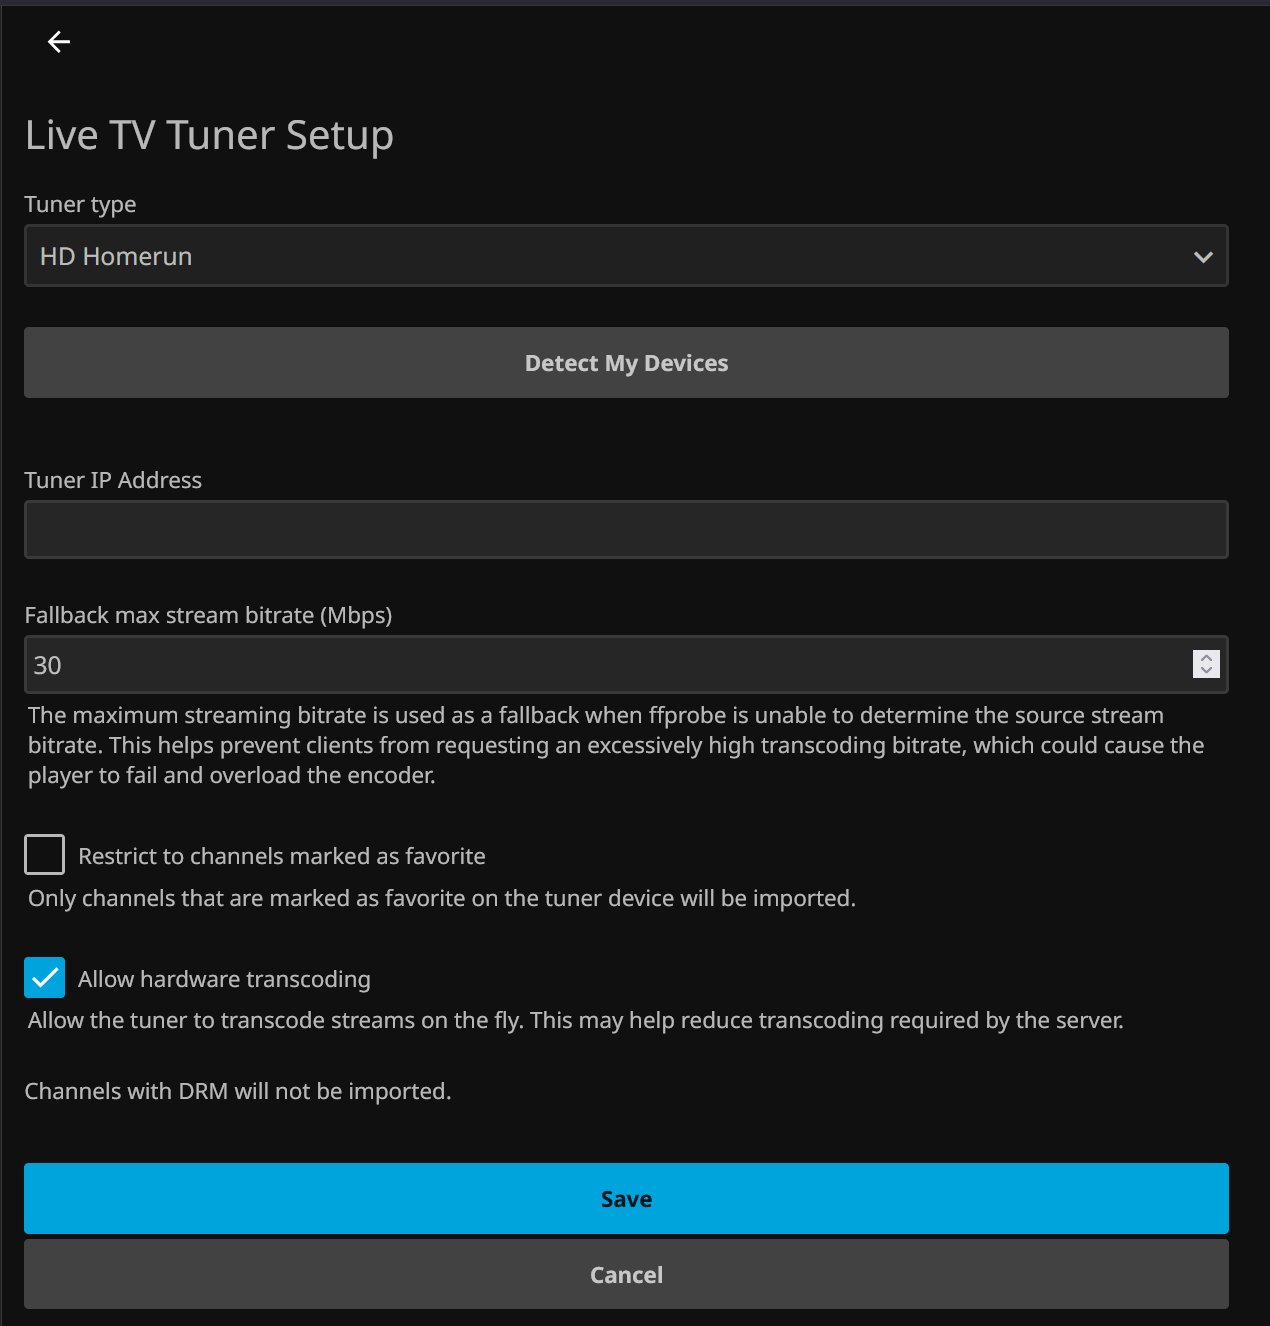
Choose HD HomeRun as tuner type and paste the URL from Dispatcharr in the Tuner IP Address field. Also check the Allow hardware transcoding box in order to have smooth playback on all your devices.
For the EPG, click the Add Provider button
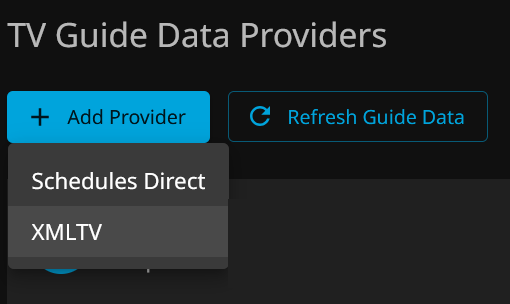
Choose XMLTV and the following dialog will appear.
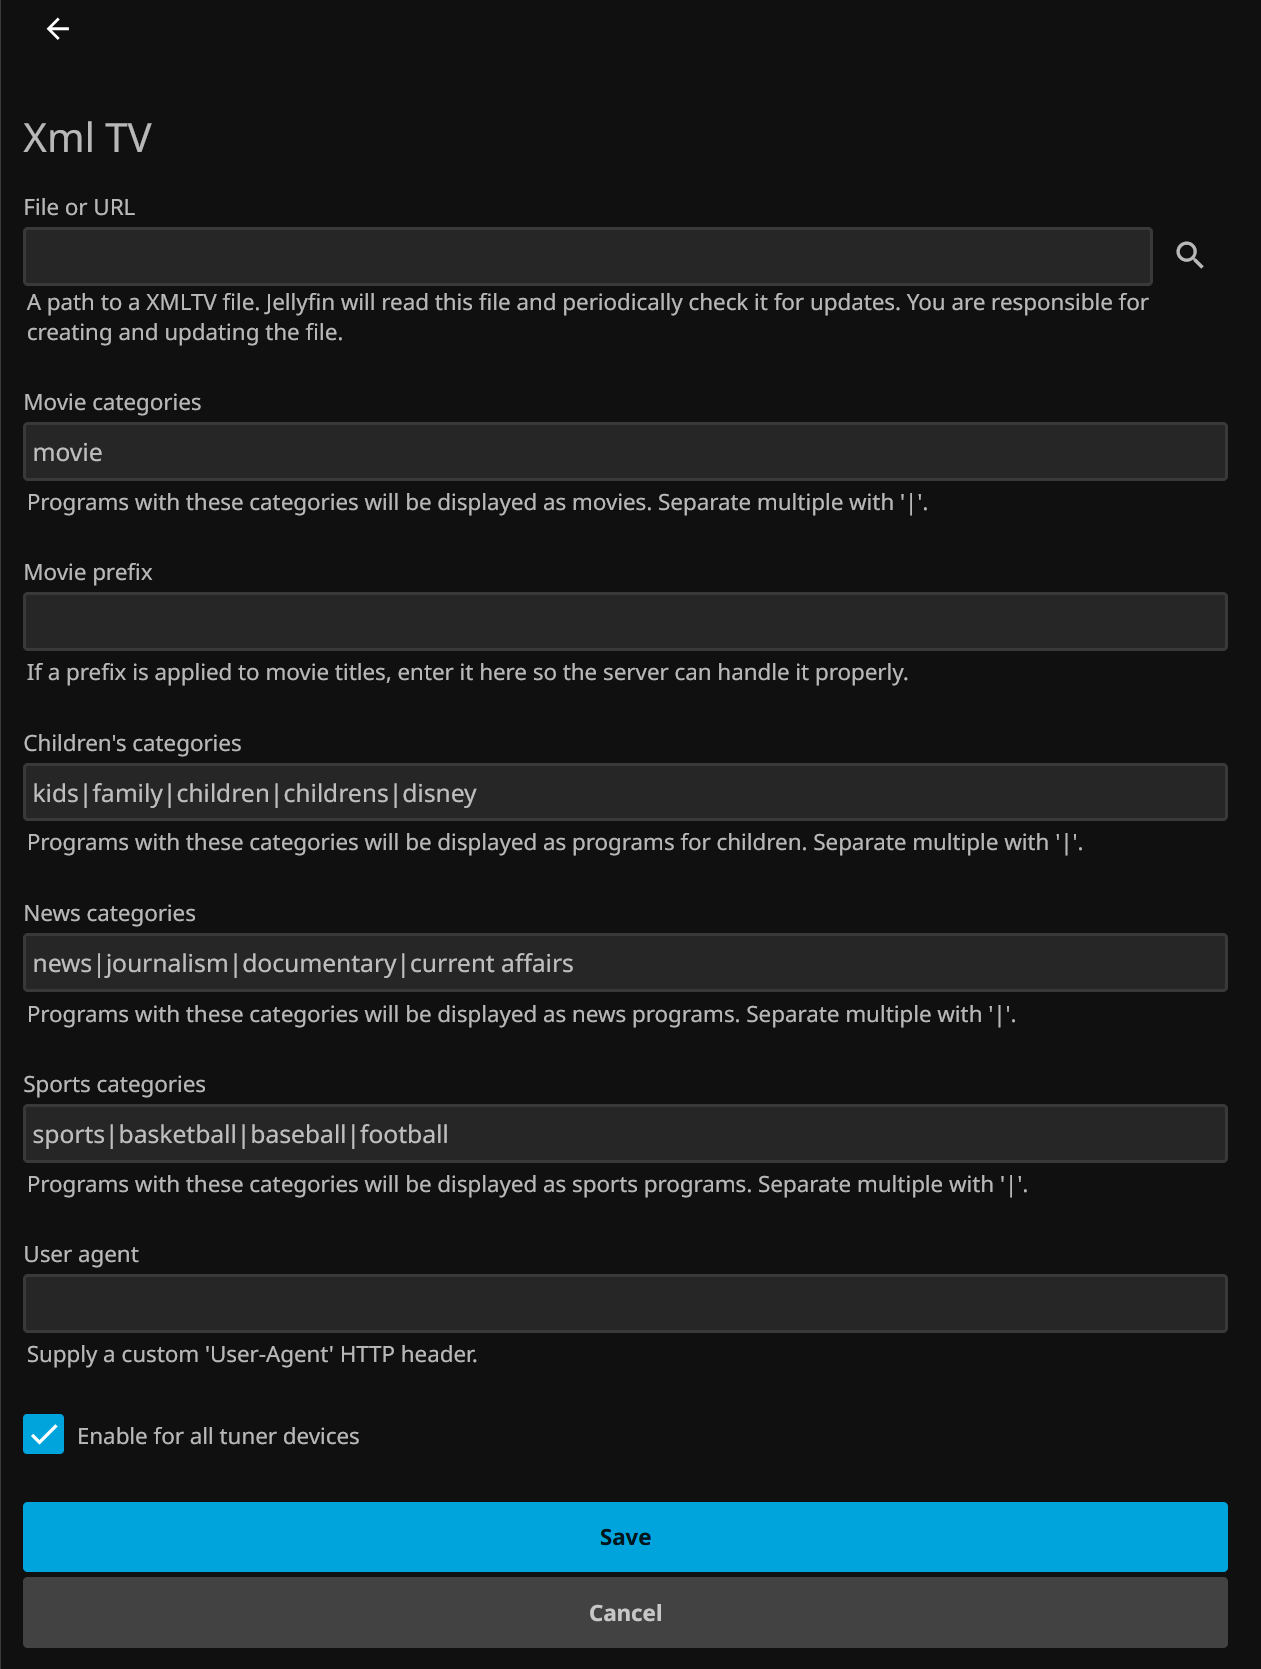
Paste the EPG URL from Dispatcharr into the File or URL field.
Click Save and you're done.
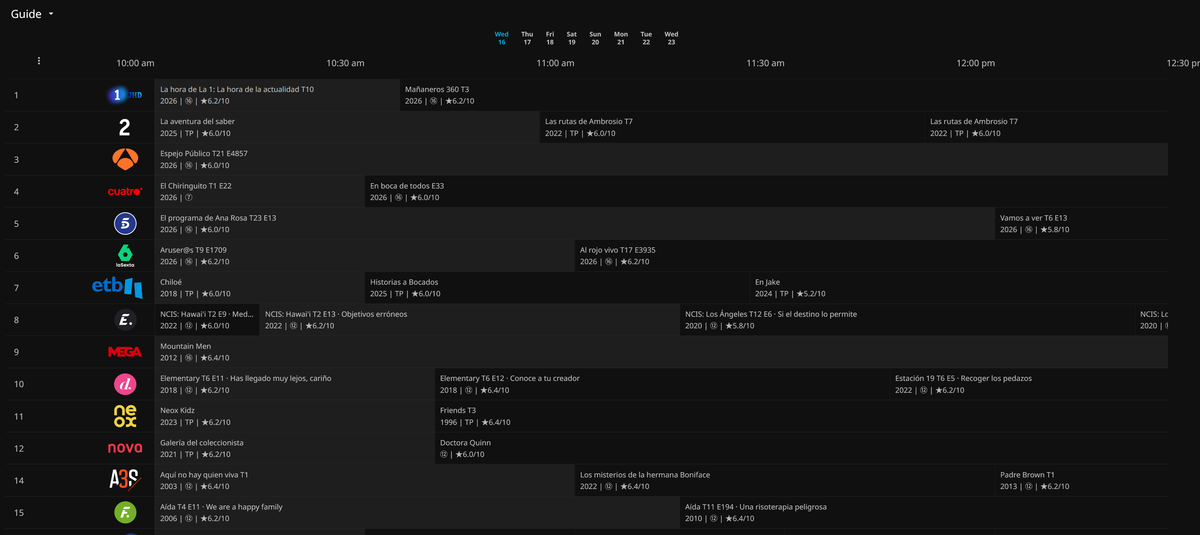
If everything went as planned, your TV guide should look similar to this:
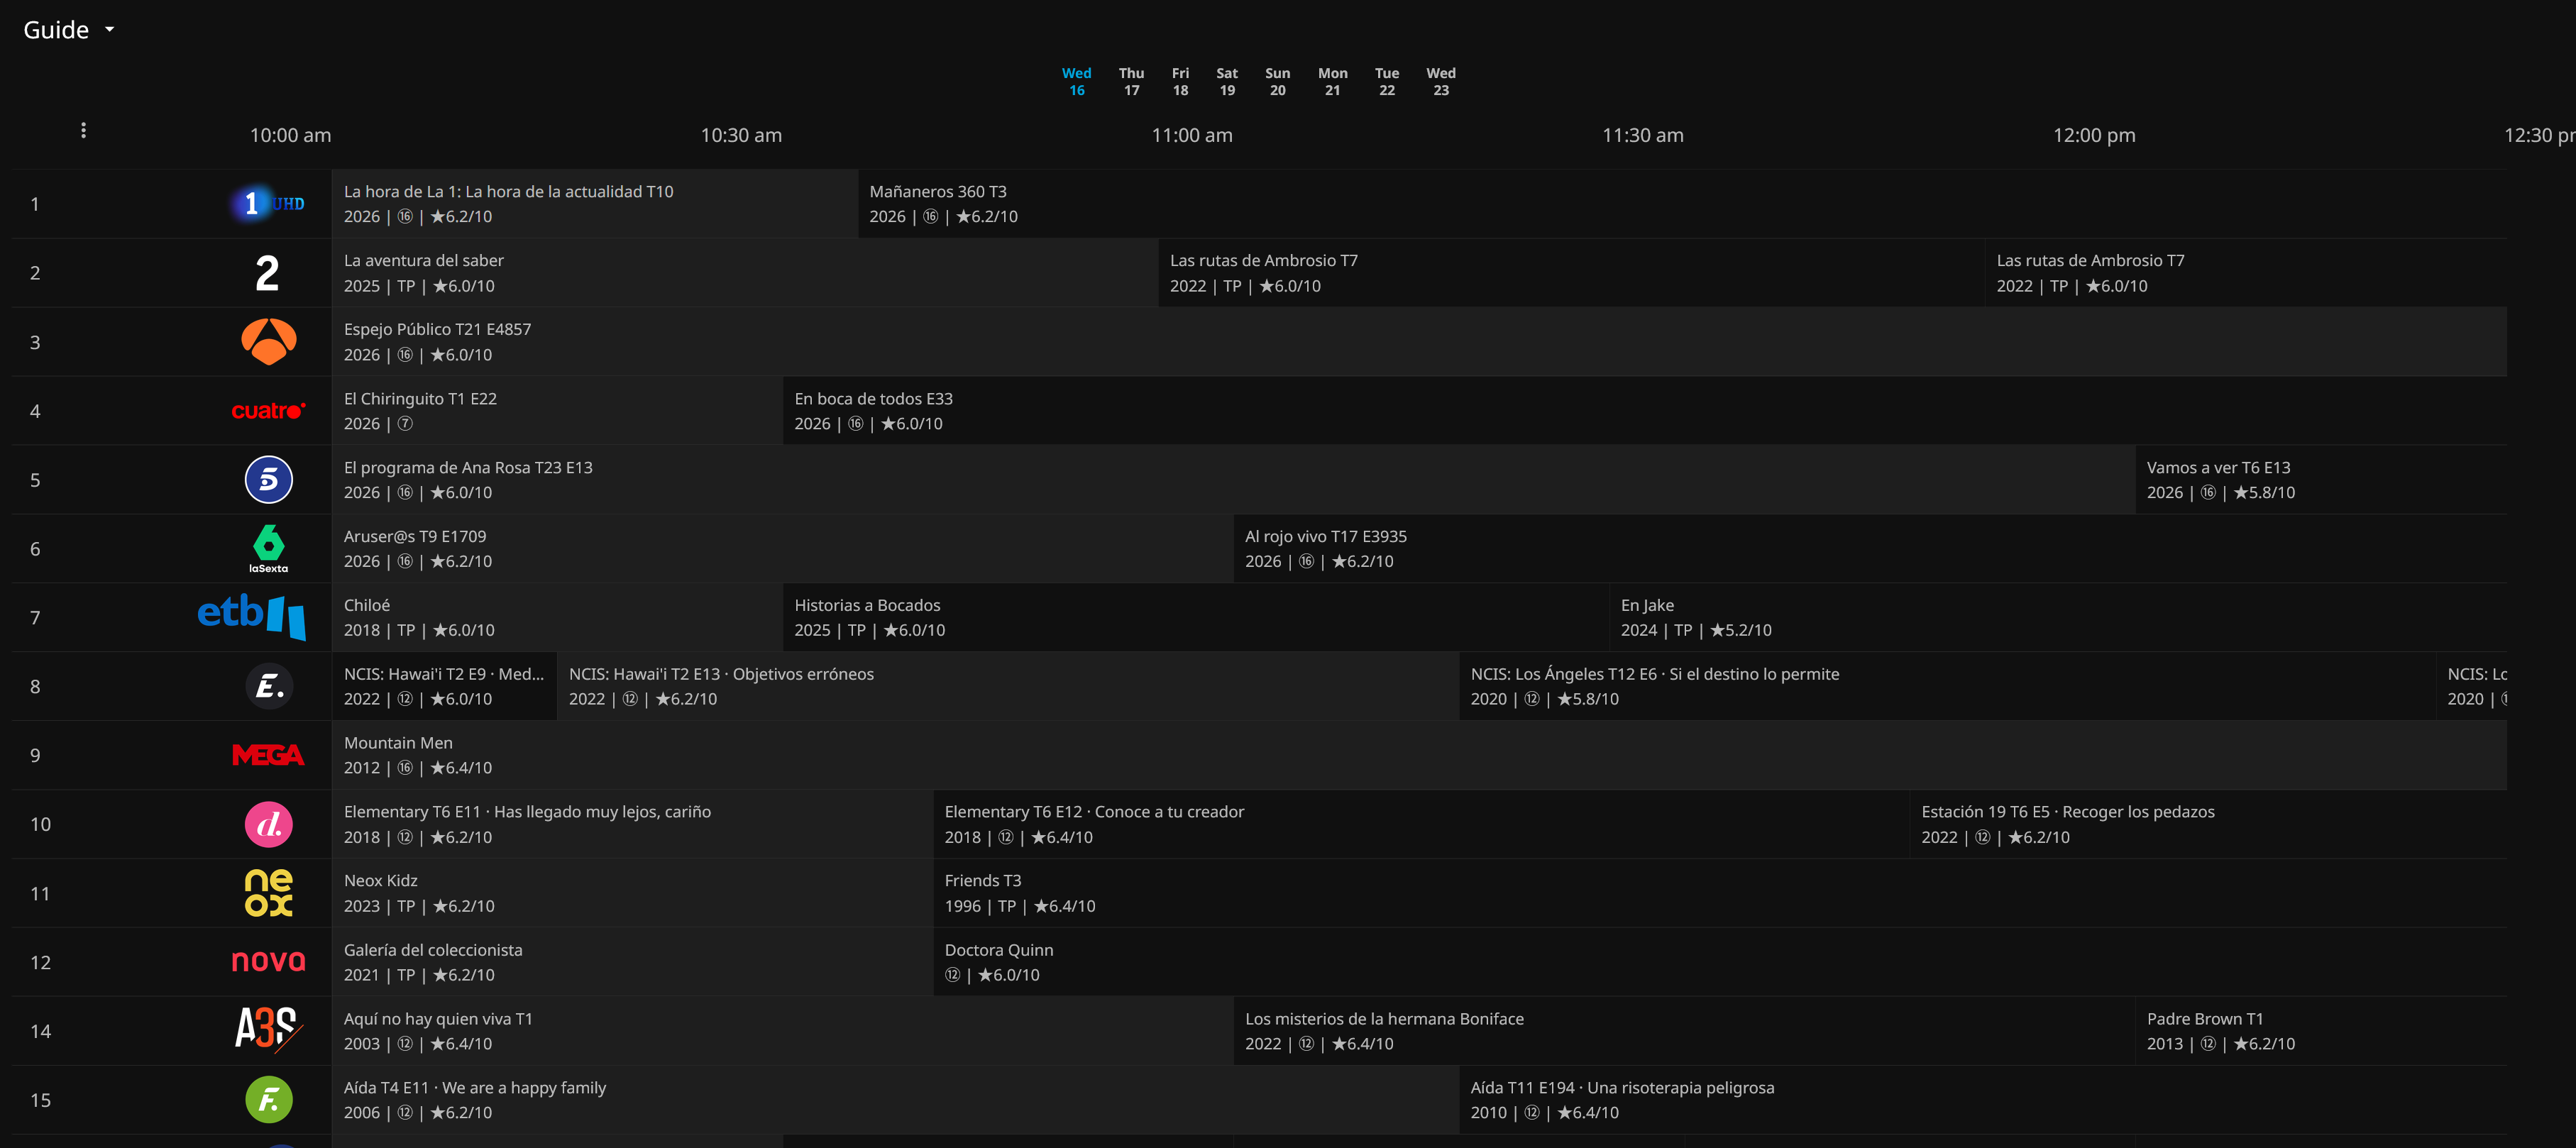
There are still a lot of things we could cover, such as recordings, series recording schedules, EPG categories, but those topics are outside the scope of this article.
For now we've got functional Live TV through Jellyfin.
Conclusion
At this point we've successfully set up Live TV that is accessible from all our devices.
No more dependence on apps from your TV provider that insist on collecting telemetry along the way. ;)
We've done a great deal of work, but we've only scratched the surface. Some topics I briefly touched on, such as receiving and distributing your own DVB signals, require very specific hardware, knowledge, and often region-specific considerations.
Still, we've built a solid foundation. With Dispatcharr handling channel management and Jellyfin acting as the frontend, we now have a flexible, self-hosted Live TV platform that can be expanded and refined over time.