Watching Live TV on all your devices
In recent years streaming services have gained a lot of popularity. However for a multiple of reasons sometimes we might want to watch Live TV.
Depending on the place you live your ISP or cable provider might (or not) provide some kind of app to watch TV on your mobile devices. However some apps are crappy, other are limited in the channels you can watch or other might have a very limited feature set. For these reasons you might want to watch Live Tv on your own terms.
In this article we will look at how you would go about setting up Live Tv on your own infrastructure. In the end you'll be able to stream Tv through web, mobile devices in a very convenient way.
In order to reach our end goal we will perform the following steps: – Installing and setting up iptiv-org/epg to acquire EPG data – Installing and setting up Threadfin – Installing and setting up Jellyfin
Disclaimer : This article's assumption is that you have some knowledge about the Linux network stack and Docker.
Setting up EPG
Getting schedules for the channels you want is quite essential in order to have a good experience. However depending on the country where you live getting EPG (Electronic Programme Guide) can be very easy or almost impossible.
By example if you live in Spain dobleM provides EPG information for almost any channel you can imagine.
However if you live in Belgium getting decent EPG information is very challenging. I've looked through forums and not found any source available.
Setting up your own EPG provider
So what do you do there are no EPG sources available for your country or for a particular channel ?
This is where iptiv-org/epg comes to the rescue.
Let's get through the necessary steps in order to set it up.
First of all you'll want a system with a static IP address. We will be using Ubuntu 22.04 in order to perform the setup process. As always feel free to use any Linux flavor you like but be aware that you might get through some roadblocks (or not) if you do so.
Updating and installing dependencies
First of all we want to make sure all our system dependencies are up to date and and we will install our necessary dependencies.
sudo apt-get update \
  && sudo apt-get upgrade -y -q \
  && sudo apt-get install curl -y \
  && sudo apt-get install git -y
Installing Nodejs
In order to install the latest supported NodeJs version we will be using NodeSource. There are other ways you could do the same but this is the most convenient way to do it.
Note : At the moment NodeJS 22 is not compatible with the software we're installing.
curl -fsSL https://deb.nodesource.com/setup_21.x -o nodesource_setup.sh
sudo -E bash nodesource_setup.sh
sudo apt-get install -y nodejs
Once you've performed these steps the command node -v should return v21.x.x.
Installing iptiv-org/epg
Now we can proceed to the actual installation of our EPG provider. First we will make a directory where we will perform the installation
mkdir /bin/epg -p
Now we want to go into the directory we just made by typing cd /bin/epg
At this point we are ready to clone the git repository into our server.
git -C /bin clone --depth 1 -b master https://github.com/iptv-org/epg.git
Once the source code is on our machine we can install the necessary dependencies.
npm install
In order to serve our files over the network we also want to install an npm module called pm2
npm install pm2 -g
Now we will create two scripts that will enable us to start our EPG provider at startup. start.sh :
#!/bin/bash

pm2 --name epg start npm -- run serve
npm run grab -- --channels=channels.xml --cron="0 0,12 * * *" --maxConnections=10 --days=14 --gzip
stop.sh :
#!/bin/bash

pm2 delete 0
To use these scripts we need to create our service file typing nano /etc/systemd/system/epg.service
Put the following content in the file :
[Unit]
Description=Epg
After=network.target

[Service]
ExecStart=/bin/epg/start.sh
ExecStop=/bin/epg/stop.sh
WorkingDirectory=/bin/epg

[Install]
WantedBy=default.target
As a last step we need to tell the system is should reload it's services by typing systemctl daemon-reload.
We've just completed the installation of our own EPG provider but in order to get actual EPG information we need to tell it which channels we want information for.
We do this by creating a file called channels.xml by typing nano channels.xml.
An example of the contents for this file looks like this :
<?xml version="1.0" encoding="UTF-8"?>
<channels>
 <channel site="movistarplus.es" lang="es" xmltv_id="24Horas.es" site_id="24H">24 Horas</channel>
</channels>
The contents of this file depend on which providers and channels you want to use. In the repo you can look for all available providers. Each provider has a list with it's available channels.
Be aware that not all providers are equal. For example telenet.tv is rock solid but lacks program thumbnails for most channels. And in contrast pickx.be keeps breaking because of intentional API changes but most programs have thumbnails.
Finding the right providers for the right channels is a process of trial and error and also depends on what you're willing to deal with.
These are some providers you could use :
- telenet.tv (Belgium)
- pickx.be (Belgium)
- movistarplus.es (Spain)
- programacion-tv.elpais.com (Spain)
- tvgids.nl (Netherlands)
- tv24.co.uk (UK)
- tvtv.us (US)
- chaines-tv.orange.fr (France)
This list is by any means extensive and if you're looking for other countries you should check which providers are available
Setting up Live Tv streams
The next piece of the puzzle is getting the streams for the channels you want. The options you have depend a lot on where you live and on your goals.
For example in the US you could use a HD HomeRun. In some countries (like Spain) you could install a DVB-T2 decoder into your system and setup tvheadend to stream over the network. However if you live in countries where open standards were purposely not adopted (like Belgium) you're only option is to resort to an IPTV provider.
There are some IPTV list available like iptv-org/iptv or TDTChannels that just list publicly available streams and that are completely legal.
If you still choose to use an IPTV provider that infringes copyright please be aware that depending on legislation you could be sanctioned for just being a customer. Be also aware that getting scammed while sourcing an IPTV provider is a real possibility. I don't want to encourage neither recommend you to source an IPTV provider that infringes copyright. If you make that decision you do so under your own responsibility. Please be careful and try to minimize risks as much as possible.
Some pieces of software (like Jellyfin) offer a direct integration to the HD HomeRun. If you have such a device you can directly integrate it. However I would recommend to use Threadfin as an intermediate layer in order to manage EPG and channel numbering. If you're using an m3u stream from tvheadend or an IPTV provider you can't get around using this piece of software.
Installing Threadfin
This is how a Docker compose file would look like for Threadfin without any additional precaution :
version: "3.5"
services:
  threadfin:
    image: fyb3roptik/threadfin
    environment:
      - PUID=${PUID}
      - PGID=${PGID}
      - TZ=${TIME_ZONE}
    volumes:
      - ${THREADFIN_CONFIG_DIR}:/home/threadfin/conf
    ports:
      - 34400:34400
    restart: unless-stopped
If you would like to take some precaution gluetun is a very good option. This is basically a Docker image that allows you to configure almost any VPN provider.
In the wiki you can find information about how to setup your particular VPN provider.
So if you would like to take precautions your compose file would look like this :
version: "3.5"
services:
  vpn:
    image: qmcgaw/gluetun
    cap_add:
      - NET_ADMIN
    devices:
      - /dev/net/tun:/dev/net/tun
    sysctls:
      - net.ipv6.conf.all.disable_ipv6=0
    environment:
      - TZ=${TIME_ZONE}
      - VPN_SERVICE_PROVIDER=${YOUR_PROVIDER}
      ....
      # some provider specific variavles
      ....
      - FIREWALL_OUTBOUND_SUBNETS=${YOUR_SUBNET}/24
    ports:
      - 34400:34400
    volumes:
      -  ${VPN_CONFIG_DIR}:/config
    restart: unless-stopped
  threadfin:
    image: fyb3roptik/threadfin
    environment:
      - PUID=${PUID}
      - PGID=${PGID}
      - TZ=${TIME_ZONE}
    depends_on:
      - vpn
    network_mode: service:vpn
    volumes:
         - ${THREADFIN_CONFIG_DIR}:/home/threadfin/conf
    restart: unless-stopped
Setting up Threadfin
Once Threadfin is installed we need to set it up.
Basic settings

Before we continue we want to open the settings page.
We want to change the following things :
– EPG Source to XEPG
– Replace missing program images should be checked
– Stream Buffer: to VLC
If you notice that your streams are stuttering you can experiment with increasing Buffer Size.
The Number of Tuners setting sets a system wide maximum number of streams. Choose a realistic number based on your needs and system performance. This setting can also be overridden at playlist level to a lower value.
If you're going to use TVHeadend the Ignore Filters setting will make things easier later on.
Playlist settings

The first time you open this page you will be greeted by an empty page.
When you press on the new button you will be greeted by the following dialog.

Choose M3U if you're using an stream (IPTV or TvHeadend) or choose HdHomeRun if you're using that particular device.
Depending on your choice you will see once of these dialogs.
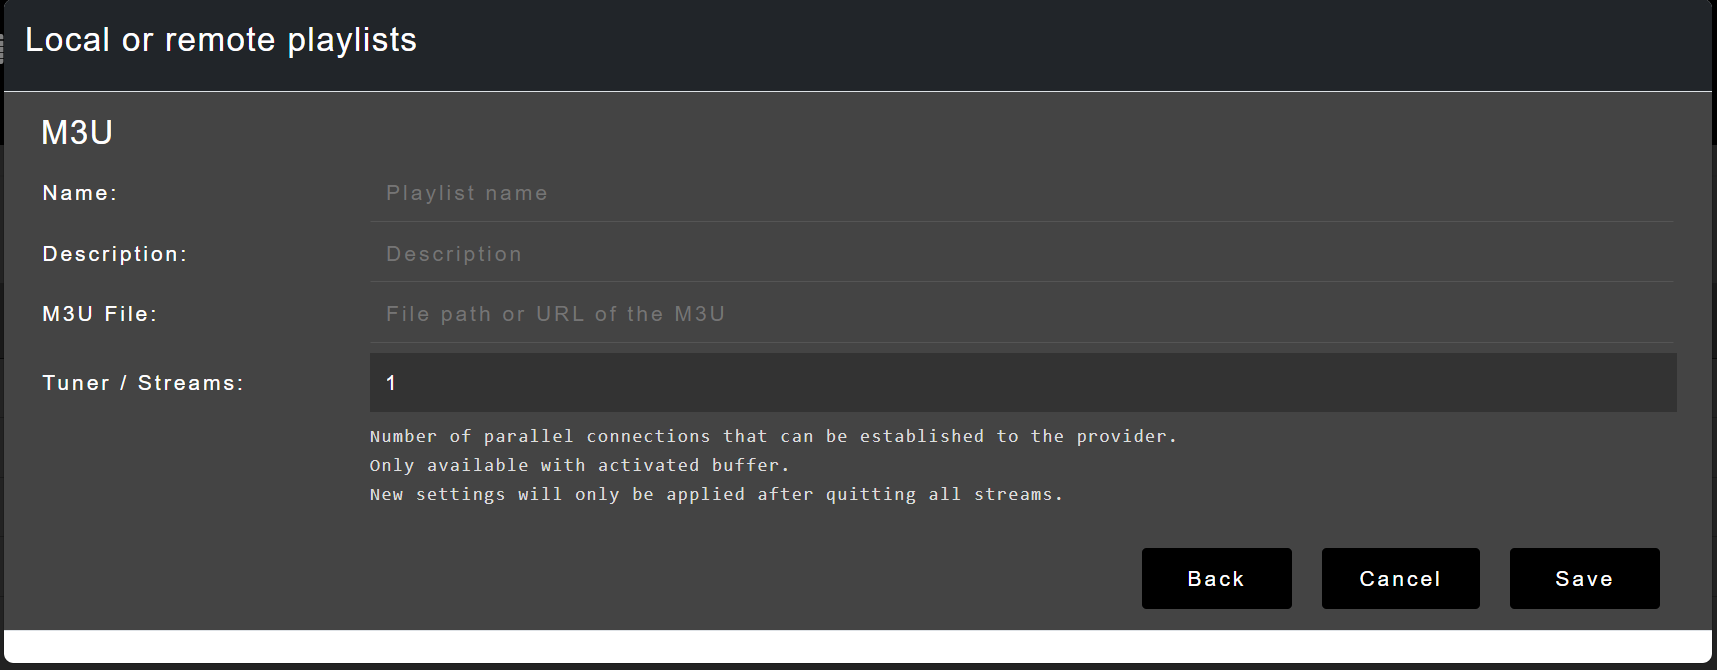
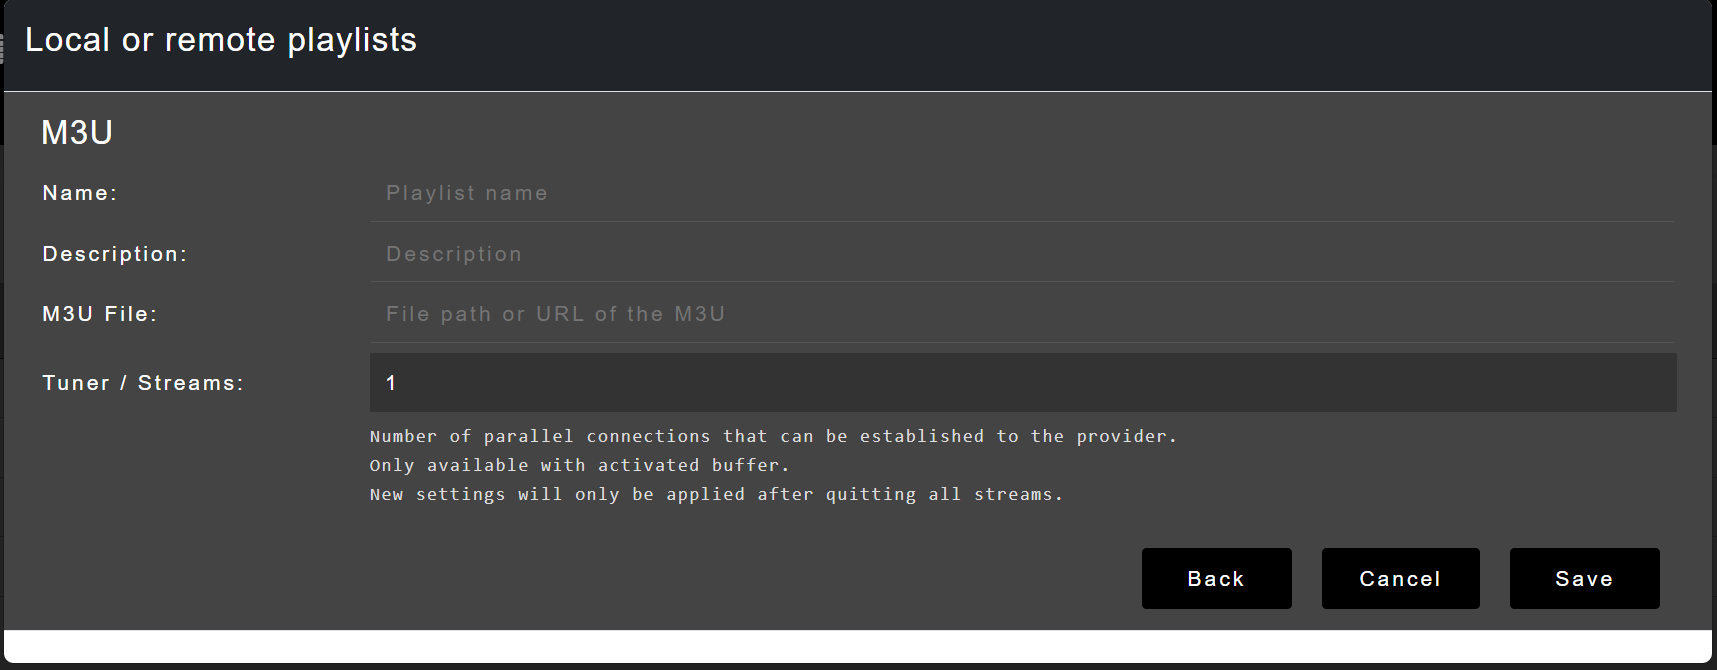
The M3U file or HDHomeRun IP fields are the most crucial part.
Fill in the address to the M3U file or your HDHomeRun device on your local network.
You also want to set the Tuner/Streams amount to a reasonable amount. If you're using TV Headend, a public IPTV list or HdHomeRun this will be hardware constrained (number or tuners and general system performance. If you're using a IPTV provider this will be whatever their general policy permits.
XMLTV settings

This page will also be empty when you open it up for the first time. In my opinion this is one of the strengths of Threadfin. Regardless of whether you have any EPG information you can mix and match different sources to the combination you like.
When you press on the new button you will be greeted by the following dialog.

You can give it whatever name and description you like. The XMLTV File field is the part that really matters. If you want to use a publicly available source you just fill in the corresponding URL according to their documentation. If you followed along and set up your own EPG provider the address will be <EPG IP ADDRESS>:3000/guide.xml.
Filter settings
If you plan to use TvHeadend and enabled the Ignore Filters setting you can skip this section.
Otherwise open this page and since we're getting started it will be empty. The general idea of this page is that in most cases IPTV lists contain hundreds if not thousands of streams. In order to not affect system performance and keep things manageable we need to choose the categories we'll want to map later on. Choosing one particular category doesn't mean we are forced to map all channels in it.

Threadfin offers two different filter types M3U and custom filters. The M3U type is pretty basic and limits itself to the categories contained in group titles contained in the M3U file. The custom filter is powerful because it enables to make filters on specific patterns.
Now I need to be honest, at some point I've tried to use custom filters but I didn't figure it out. I think that depending on playlist size it might take quite some time to process since it needs to check for a pattern for each stream in the playlist. However that's just an assumption since I've not really used this feature. Feel free to try it out but I won't go into any more dept since I'm not able to.
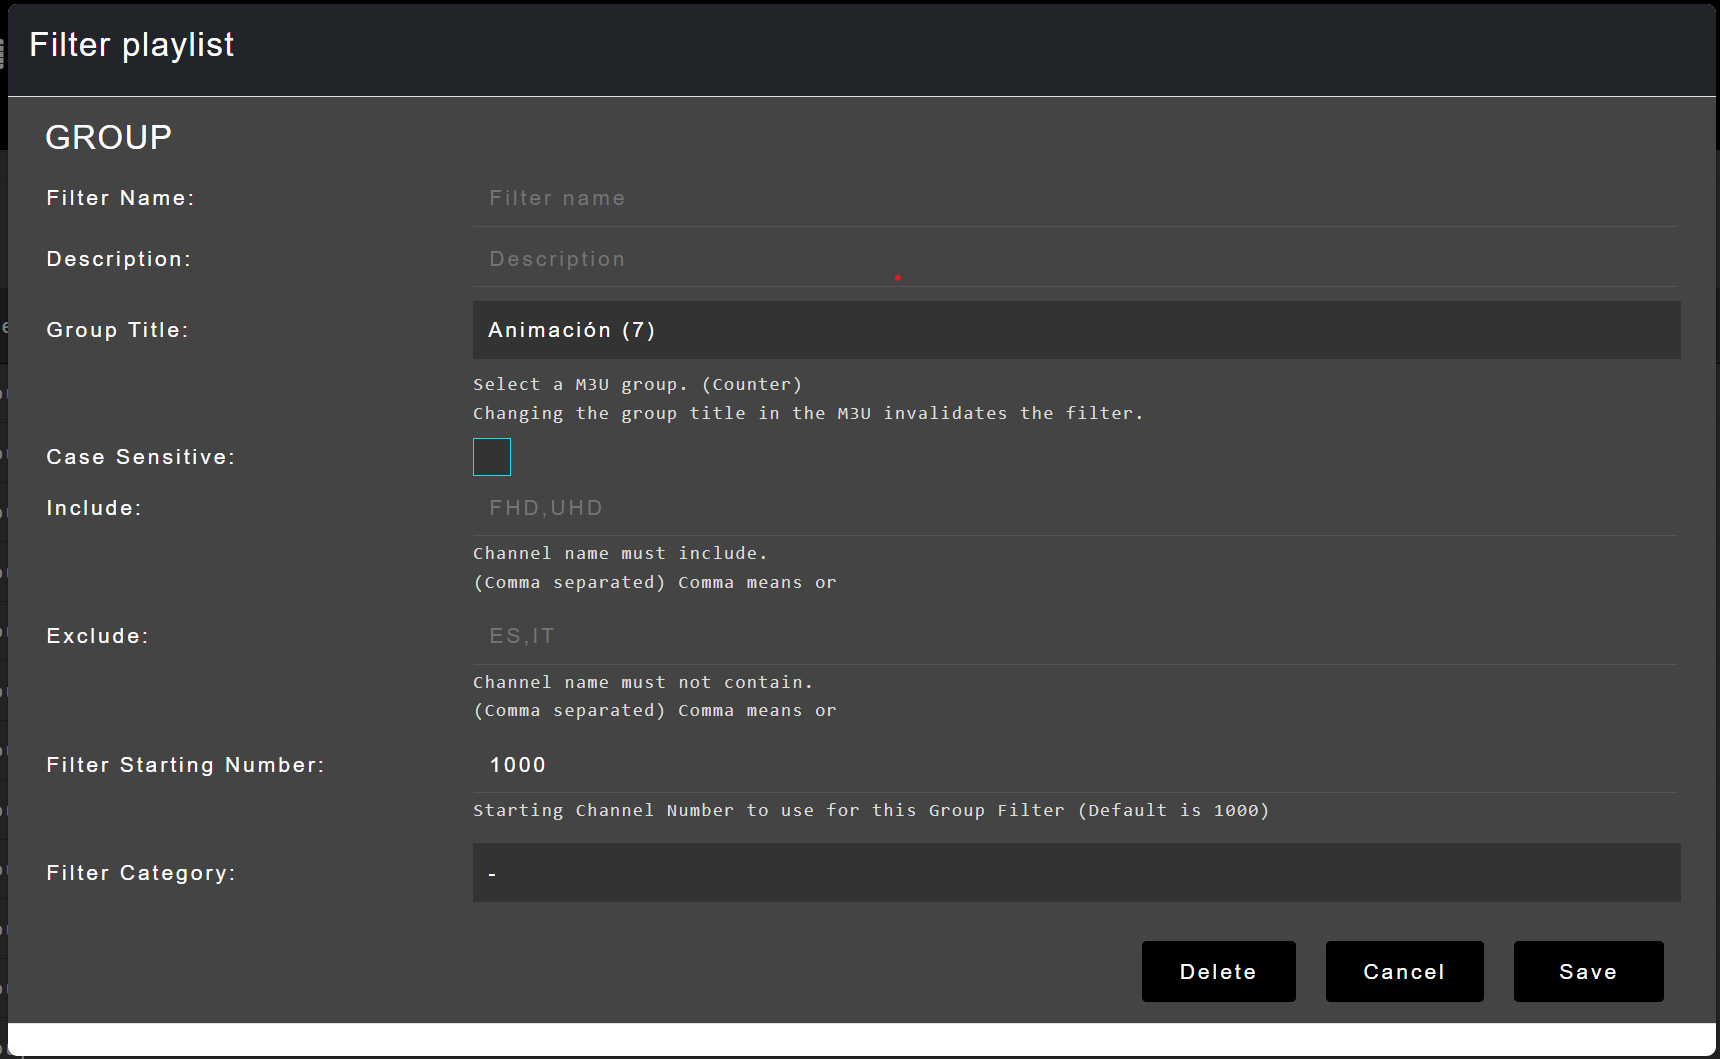 The field we want to look for is
 group title. This will make the chosen group title available in the mapping tab. You can have a look at the include/exclude settings if you want so but it's not strictly necessary.
Mapping settings
When opening the mappings page you won't be greeted by an empty list.
Most probably you'll be greeted with a list with unmapped/inactive channels.
You can make the distinction because of the red line on the left end of the table.

Before activating a channel you should first assign it the number of your liking. You do this by typing the desired value in the text field.
In order to continue click on the desired channel in order to open the map channel popup.
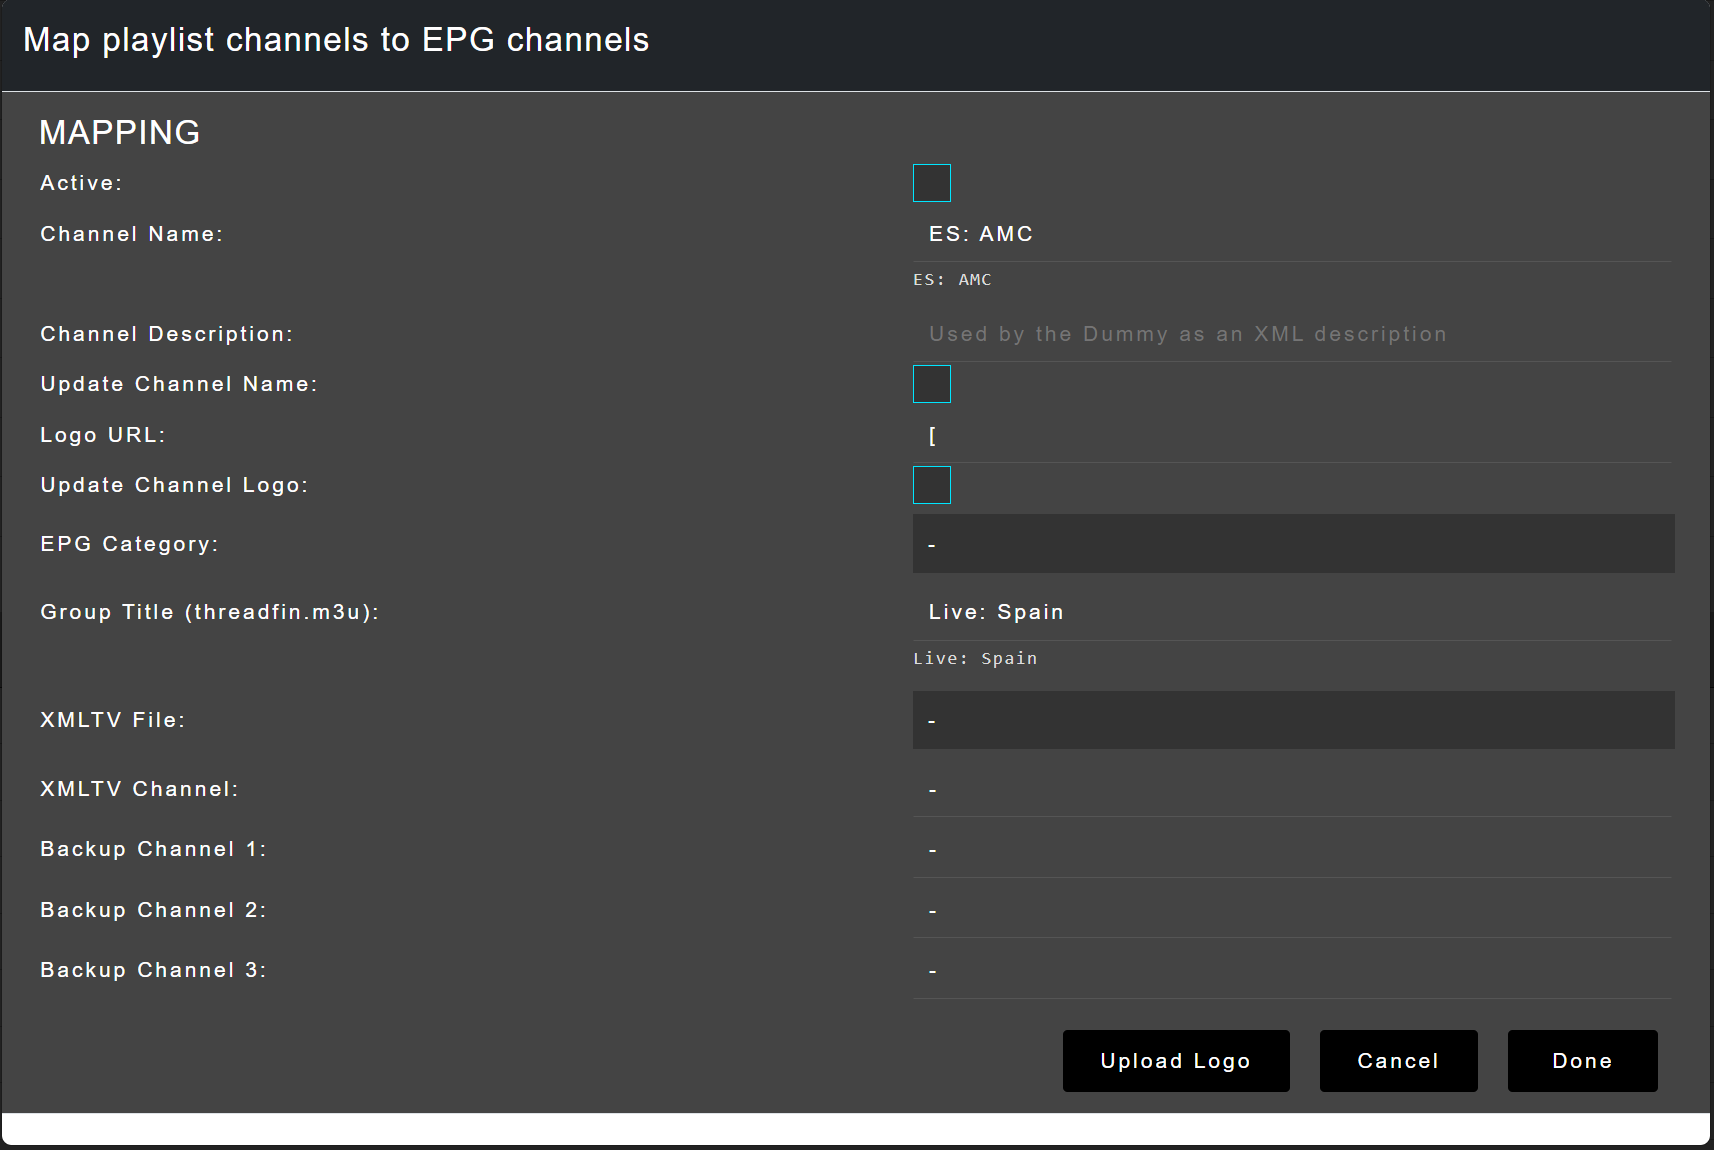
The most important settings are :
– Active to activate the channel
– Channel name to edit the channel name
– Logo Url to assign the channel a logo
– Group title to group the channel to your liking
– XMLTV File in order to choose the XMLTV file you want to use
– XMLTV Channel to choose the right channel in the XMLTV file
Once you've chosen your desired settings click on the done button. Now there also should be a list with active/mapped channels. You can make the distinction because of the green line on the left end of the table.

Mapping all desired channels can be a repetitive task but as you'll see in the end the effort is worth it.
Note : In the next steps we'll be talking about setting up and installing Jellyfin. However you can use Threadfin with any software that supports the HD HomeRun since it functions as an emulation layer. Other software of the likes of Plex Media Server, Kodi and Emby exist that enables you to do the same. However Jellyfin is the only open source solution that enables this feature without any paid plan and on the server side (Kodi is a client application).
Installing Jellyfin
This is how a compose file for a Jellyfin installation looks like :
version: "3.5"
services:
  jellyfin:
    image: jellyfin/jellyfin
    user: ${PUID}:${PGID}
    ports:
      - 8096:8096
    volumes:
      - ${CONFIG_FOLDER}:/config
      - ${CACHE_FOLDER}:/cache
      - ${MOVIES_FOLDER}:/Movies
      - ${TV_SHOWS_FOLDER}:/Tv Shows
      - ${RECORDINGS_FOLDER}:/recordings:/recordings
    restart: unless-stopped
    depends_on:
    environment:
      #use this variable if you want to access your Jellyfin server through a domain name
      - JELLYFIN_PublishedServerUrl=http://jellyfin.yourdomain.com
Once you deploy this compose file Jellyfin will be available through port 8096 or through the domain you've set up. Complete the setup wizard and setup your libraries.
After this click on your user icon and open the administration panel
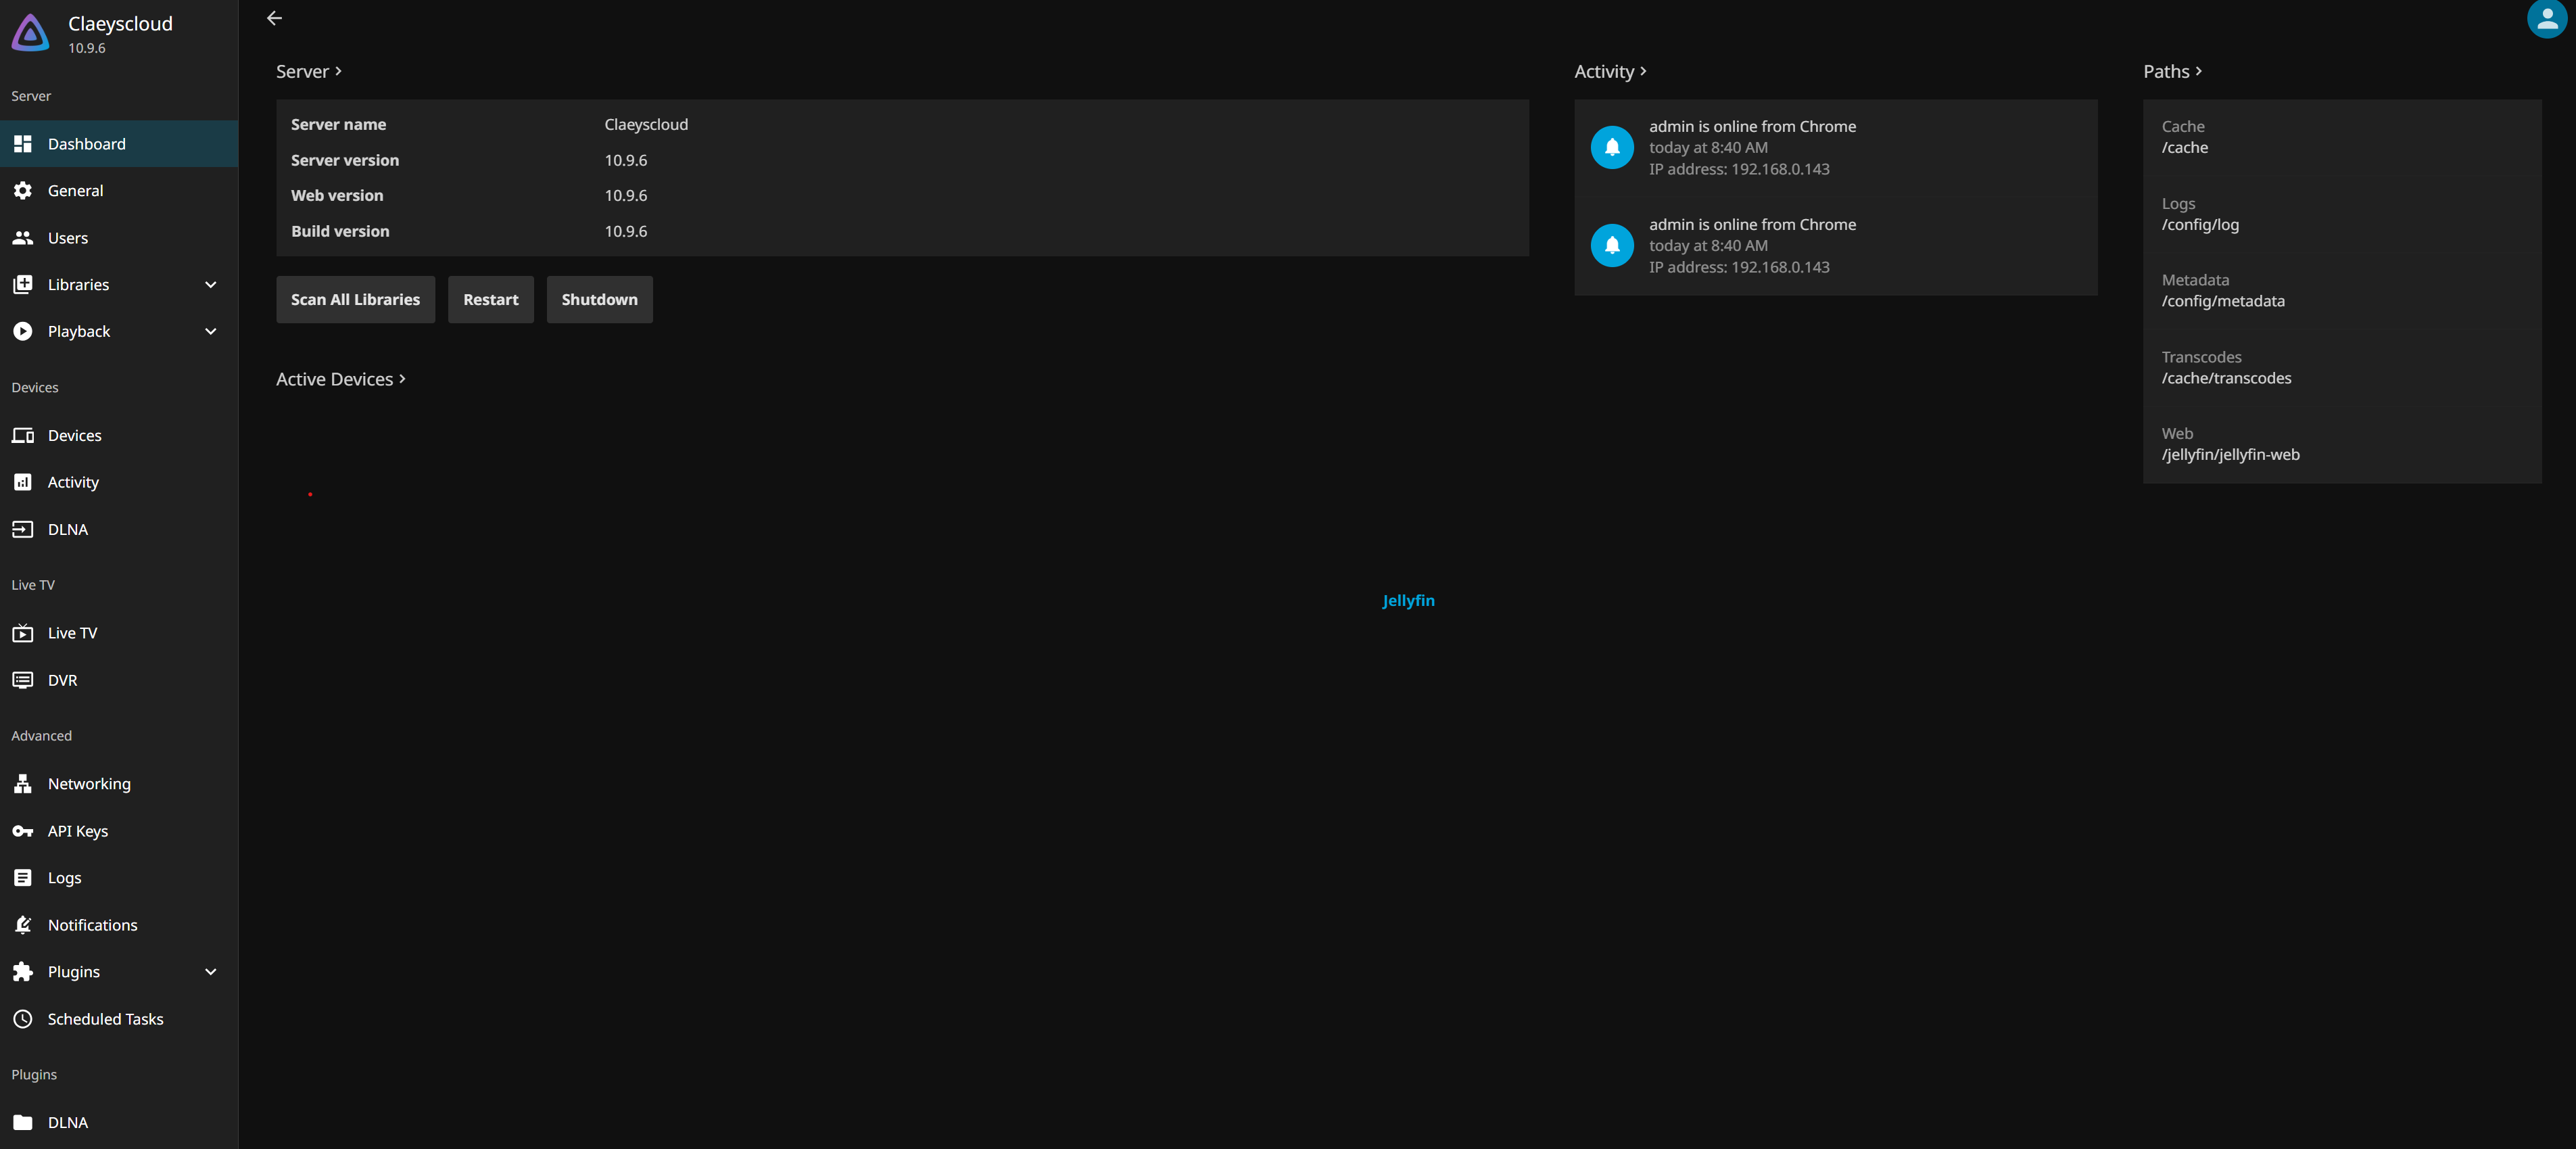
We want to go to the Live Tv section of the admin panel. Click on the + button under Tuner Device.
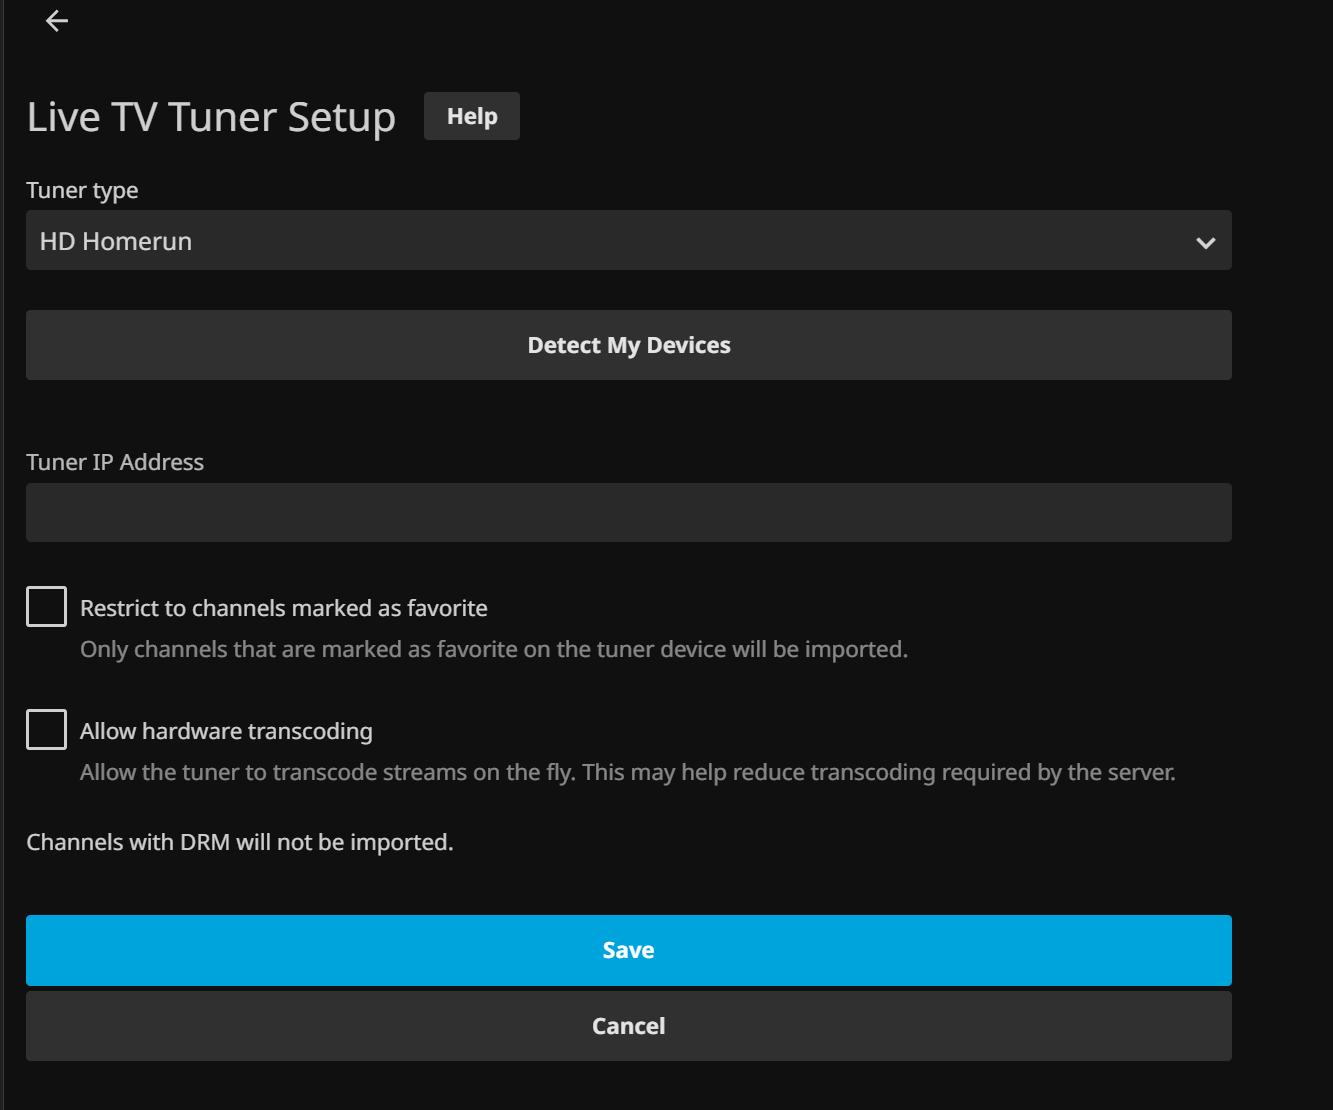
Select HD Homerun as the Tuner Type and check the Allow hardware transcoding checkbox.
Under Tuner IP Address you should type http://<THREADFIN IP ADDRESS>/. Once that's done click on the save button.
Last but not least click on the + button under TV Guide Data Providers and choose XMLTV.
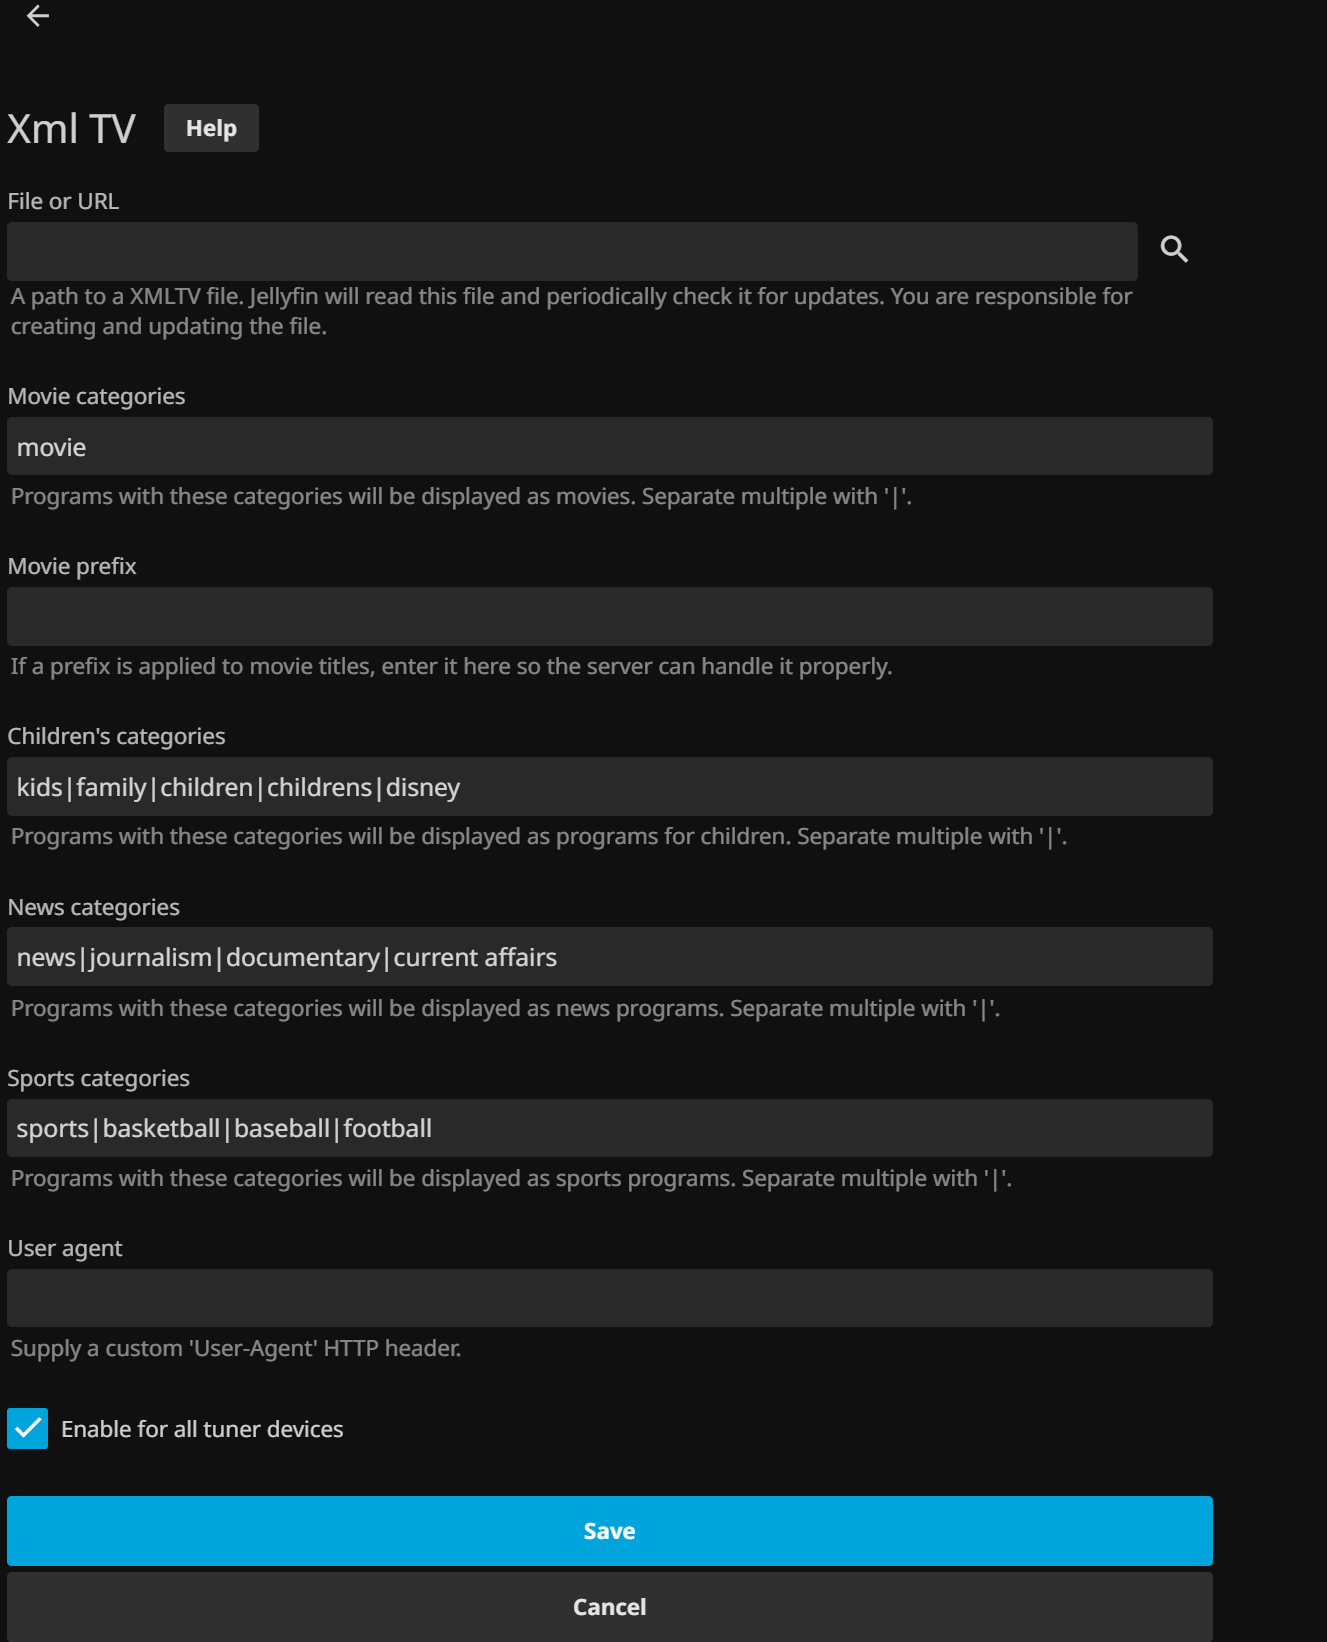
The only thing you need to do is type http://<THREADFIN IP ADDRESS>:34400/xmltv/threadfin.xml under File or URL. Click on the save button and you're all set.
Jellyfin will need some time in order to gather all necessary information but after a while live tv will be available.
Jellyfin is available through the web interface and different apps. The UI is pretty straightforward so we won't go into detail on this topic. You've just setup up live tv on your server on your terms.